What’s up guys it’s JV Charles.Did you know the average person in the UK eats over 10,000 peas a year? That’s a lot of peas! You don’t have to buy them from the store to enjoy this tasty and healthy veggie. With container gardening, you can grow your own peas at home, even with limited outdoor space. I do it every year! Peas are great for container gardens. They grow fast and need little care but give a big harvest for a small effort. For growing peas in containers, you need full sun and moist soil. They like cool weather, so plant them early in the season for a big harvest. When it gets warm, they stop producing. Then, you can switch to a different vegetable that loves the heat. Peas take about 60 to 70 days to grow from seeds to maturity. They don’t have deep roots, so use planters that are at least 8 inches deep. You can go up to about 18 inches deep for better root growth. It’s worked great for me! Key Takeaways Peas are an ideal vegetable for container gardening, providing a bountiful harvest with minimal effort. Super cool! Peas thrive in cool conditions and should be planted early in the season for best results. Container depth of 8-18 inches is recommended to accommodate pea root growth. Proper soil pH between 6-7.5 is crucial for optimal pea plant growth and production. A variety of pea types, including sugar snap, English, and snow peas, can be successfully grown in containers. Why Grow Peas in Containers? Peas are great for small gardens. They do well in containers, ideal for city folks, apartment dwellers, and those with little outdoor space. Peas grow fast, produce a lot, and fit well in pots and planters. Peas are Perfect for Container Gardening Peas don’t need super deep soil to grow. A container that’s at least 8 inches deep is enough for them. This makes peas great for gardeners with limited space or who want to use their space wisely. Quick Growth and Bountiful Harvest Growing peas in containers is quick and rewarding. They can be ready to eat in about 55 days. Plus, pea plants give a lot of peas from just a few plants. Whether you’re growing sugar snap peas, English peas, or snow peas, containers are a great choice. They’re small, mature fast, and produce a lot. Peas are perfect for small gardens. Choosing the Right Pea Varieties for Containers When picking pea varieties for containers, we have many great options. Favorites include sugar snap peas, English peas, and snow peas. They all rock ! Each type has its own flavor and grows well in container spaces.
Container Gardening Raspberries: Easy Home Growing Tips
Hey guys its JV Charles. Did you know dwarf raspberry varieties like ‘Ruby Beauty’ and ‘Yummy’ are great for patio and balcony gardens? These breakthroughs in container-friendly growing have opened new doors for city gardeners. They now can enjoy the sweet taste of fresh raspberries right at home. Container gardening lets us grow raspberries without big gardens or yards. If you have a small patio, balcony, or even just a windowsill, you can grow your own raspberries. The right varieties and techniques can turn your space into a lush spot for tasty berries. So cool Key Takeaways Dwarf raspberry varieties like ‘Ruby Beauty’ and ‘Yummy’ are perfect for container gardening Raspberries can thrive in pots as small as 30cm across, making them ideal for small spaces John Innes No. 3 or a peat-free potting mix is recommended for growing raspberries in containers Pot-grown raspberries require more frequent watering, especially during the summer months Mulching and regular fertilization can help maintain soil health and raspberry productivity Introduction Growing raspberry container benefits has many perks over planting them in the ground. You can move potted raspberries to get more sunlight and control the soil for better growth. Plus, their spreading nature is kept in check, perfect for small spaces or patios. I love em! Choosing the Right Raspberry Varieties for Containers Look for container friendly raspberries that are compact and bushy for small areas. Great picks include Raspberry Shortcake, Heritage, Red Latham, and Anne. These dwarf raspberry plants do well in pots and don’t need big support systems. Starting with a few bare root raspberry canes in fall can give you tasty everbearing raspberry cultivars for three years. Raspberries in pots need a big pot and regular watering when they’re making fruit. But, the hard work pays off. Dwarf varieties last longer in pots, making them great for container gardens. “Raspberries can be grown successfully in pots, with modern compact varieties being easier to manage.”-JV Charles, Founder Garden Josiah All raspberry varieties can be grown in containers, giving gardeners many choices. Whether you like fall-bearing or everbearing types, there’s a container friendly raspberry for your patio or balcony. Container Gardening Raspberries: Getting Started Starting your raspberry container garden means picking the right pot size. Raspberries need wide and deep containers, at least 16 inches in diameter. This size supports their roots and growth. Half-barrels or large grow bags work great too. Make sure your pot has good drainage to avoid waterlogged soil, which harms raspberries. Preparing the Soil Mix Raspberries do well in slightly acidic soil (pH 6.0-6.2) that’s rich in nutrients. Add compost, aged manure, or peat moss to the soil. This step is key for giving your raspberries the right nutrients and moisture. Raspberry Variety Plant Size Fruit Color Fruiting Season Raspberry Shortcake 2-3 feet Red Midsummer Heritage Raspberry Bush Varies Red Everbearing Red Latham Up to 6 feet Red Summer-bearing Anne Varies Pale Yellow Everbearing Glencoe Purple Thornless Floricane Raspberry Less than 3 feet Purple Summer-bearing Choosing the right container size and preparing the soil with the correct mix sets you up for a great raspberry harvest. You can enjoy this in your backyard or on your patio. Planting Raspberries in Containers Planting raspberries in containers can bring a touch of homegrown flavor to your patio or balcony. You can use either bare-root canes or potted transplants. This method is easy and very rewarding. Bare-Root vs. Potted Plants Bare-root raspberry canes might look simple at first, but they grow well in containers. For each 16-inch container, plant one cane. Potted raspberry plants are also easy to transplant. Just make sure to plant the root ball at the same depth as before. Transplanting Techniques Start by filling the container with a mix that drains well and is full of nutrients. Loosen the root ball of the potted plant and put it in the container. Make sure the top of the root ball is even with the soil. For bare-root canes, dig a hole that’s a bit bigger than the roots. Put the cane in the middle, spreading the roots out. Fill the container with soil, pressing it down gently to get rid of air pockets. Add stakes or trellises to help the plant grow stable. Put mulch on top to keep the soil moist and stop weeds from growing. By following these steps, your raspberry plants will do great. You’ll get lots of raspberries, whether you’re planting bare-root raspberries, potted raspberry transplanting, or using the container raspberry planting method. Container Raspberry Growing Conditions Growing raspberries in containers requires the right conditions for success. Let’s look at the key factors for healthy, productive plants in your garden. Sunlight Requirements Raspberries love full sun, needing 6-8 hours of sunlight each day for the best fruit production. Raspberry sunlight needs are key for their health and growth. Make sure your container raspberries get enough raspberry sunlight needs. You know the needs? LOL Watering and Fertilizing Keeping the soil moist is vital for watering potted raspberries. Water them 2-3 times a week, or more in hot weather. Use a balanced, organic fertilizer when planting and a liquid kelp fertilizer later to fertilize container raspberries. Raspberry Growing Condition Requirement Sunlight 6-8 hours of direct sunlight per day Watering 2-3 times per week, or more during dry spells Fertilizing Balanced, organic fertilizer at planting; liquid kelp during growing season Give your container raspberries the right raspberry sunlight needs, consistent watering potted raspberries, and good fertilizing container raspberries. This way, they’ll grow well and give you a big harvest. Yummy. Pruning and Maintenance Proper pruning is key for the health and productivity of raspberry plants in containers. In spring, cut away any damaged or unhealthy canes to encourage new growth. Keeping the plants’ shape and size right is important during the summer. Spring Pruning When spring arrives, check your raspberry container plants closely. Remove any canes that look damaged, sick, or don’t produce much. This helps new, healthy growth happen. Strong growth you wont believe! Summer
Grow Tasty Carrots Container Gardening Guide
Hey guys it’s JV Charles.Did you know a big planter can give you up to 40 tasty carrots? You can enjoy this kind of harvest, even with a small space, by learning carrot container gardening. Whether you have a small patio, a balcony, or just a tiny garden spot, you can grow a carrot crop. And you’ll love the fresh, crisp taste of your own homegrown carrots. This guide will show you how to grow carrots in containers. We’ll cover everything from picking the right pots to planting, caring for, and harvesting your carrots. You’ll learn the secrets to being a great container carrot gardener. Get ready to improve your cooking and wow your friends and family with your gardening skills! Key Takeaways Discover the incredible yield potential of container-grown carrots, with up to 40 carrots per large planter. Yes sir! Learn how to choose the right containers and soil mixes for thriving carrot crops, even in small spaces. Explore the many benefits of growing carrots in containers, from eliminating soil-borne pests to enjoying a continuous harvest. Uncover expert tips for planting, caring for, and harvesting your carrot bounty, ensuring a bountiful and delicious yield. Discover the best carrot varieties for container gardening and how to incorporate succession planting for a steady supply. Why Grow Carrots in Containers? Growing your own carrots in containers is a great idea. You can do it on a patio, balcony, or even a small outdoor area. This lets you enjoy fresh, home-grown carrots without needing a big garden. Benefits of Container Carrot Gardening One big plus of container gardening is the control you have over the soil. You can pick a potting mix that drains well, making sure your carrots grow straight and healthy. This solves the problems of bad soil, like rocks, weeds, or poor quality. Cool right? No Soil Concerns or Pests Carrots in containers also avoid pests like slugs, rabbits, and deer. These pests can be a big problem in regular gardens. So, you can have a big harvest without worrying about pests. Sweeet! Overall, growing carrots in containers has many benefits. It’s perfect for gardeners with little space or those who want the ease and control of container gardening. It’s a fun and rewarding way to grow your own food. The Best Containers for Growing Tasty Carrots Choosing the right container is key for growing delicious carrots. Carrots need deep soil to grow fully. We suggest using big pots, planters, or fabric grow bags that are at least 14 inches deep. This depth gives carrots the 9-12 inches of soil they need to grow well. Pot and Planter Sizes for Different Carrot Varieties The size of your container depends on the carrot type you grow. Small “baby” or “miniature” carrots fit in containers as shallow as 12 inches. But, bigger carrots like Imperator or Nantes need deeper containers, 14-16 inches, for their longer roots. Materials for Carrot Containers Clay pots are good for drainage but might need more watering. Plastic or resin planters keep moisture in and need less water. Fabric grow bags are affordable and great for carrot roots, offering good drainage and air. Upcycled 5-gallon buckets with holes are a cheap way to grow carrots. Make sure your container has lots of drainage holes to avoid waterlogging. This can cause root rot. With the right size and material, you’ll grow the best pots for growing carrots at home or on your balcony. Planting Carrots in Containers Growing carrots in containers is great for gardeners with little space or those new to growing veggies. Container-grown carrots are easier to care for than those in the ground. They avoid pests, poor soil, and weeds. Let’s look at the steps to plant carrots in pots or planters. It’s a breeze! Preparing the Potting Mix For planting carrots in containers, the soil is key. Use a light, well-draining potting mix with compost. This mix helps carrots grow straight and healthy. Adding bone meal to the mix gives carrots the phosphorus they need to grow well. Sowing Carrot Seeds Carrots can be planted from mid-spring to mid-summer, before the last spring frost. To plant, moisten the soil and put the tiny seeds 1/4 inch deep and 1/2 inch apart in a grid. This makes the most of your container space. Keep the soil moist after planting for good germination, which takes 14 to 21 days. With proper soil and seed preparation, you’re on your way to a great carrot harvest. Choose varieties like Chantenay or Parisian for growing in pots and planters. Caring for Potted Carrots Growing carrots in containers needs some regular care to keep them healthy. After the seedlings come out, we must focus on watering, fertilizing, and thinning them. Doing these things right helps our container carrots grow big and tasty. Watering and Fertilizing Carrots in pots need more water than those in the ground. We check the soil and water when it’s dry an inch down. It’s important not to give them too much water. We also feed them a liquid organic vegetable fertilizer every 3-4 weeks to help them grow strong. Thinning and Hilling When the carrot seedlings grow, we need to thin them to give each one enough space. They should be 1.5-3 inches apart, depending on the type. This lets their roots grow big and healthy. If the carrots start showing above the soil, we add more potting mix to keep them underground and stop them from turning green. By keeping up with these important steps, our container-grown carrots will do well and give us a big harvest. With a bit of extra care, we can enjoy the delicious taste and crunchy texture of carrots from our pots and planters. Harvesting Container-Grown Carrots Growing carrots in containers is rewarding, giving you fresh, crunchy veggies all season. But when to harvest them depends on a few things. Most container-grown carrots are ready in 65 to 75 days after planting. This time can change based on the
Composting in Small Spaces: No-Till Solutions for City Gardeners
Hey guys JV Charles here . Would you believe In America a lot of food goes to waste, with a big part happening at home. Families throw away about $1,500 worth of groceries a year. This is a lot, about 20% of what they buy. But, cities like Portland and Boston are starting to offer composting services to help reduce waste. More people want to garden in a green way. So, we’re looking at no-till composting for city gardeners. This method helps make rich soil in small areas. Key Takeaways Composting in small urban spaces presents unique challenges, but is crucial for reducing organic waste and promoting sustainability. No-till gardening, where the soil is covered with organic mulch instead of being tilled, offers a solution for city gardeners with limited space. Innovative composting systems like the Composting Cannon can help urban residents create nutrient-rich soil without a traditional compost pile. Other compact composting solutions, such as Compot buried composting and Tumbleweed Compost Tumblers, provide options for small-space gardeners. Incorporating no-till techniques, like using cover crops and creating lasagna beds, can improve soil health and reduce labor in urban gardens. Introduction to Composting in Small Urban Spaces Living in a busy city can make composting tough. Trust me I know. Many city gardeners struggle with little space for composting. Traditional composting bins can take up too much room and might smell bad in tight neighborhoods. But, it’s crucial to reduce organic waste because it helps cut down on greenhouse gases. The Challenges of Composting in a Tiny City Garden Space is a big issue in cities, and every inch matters. Big compost bins won’t fit in small gardens or balconies. Plus, we live close to our gardens, so we must watch out for bad smells or pests. We need creative ways to manage organic waste without taking up too much space. The Importance of Reducing Organic Waste for Sustainability Composting is key to gardening sustainably and lowering our environmental impact. It keeps organic waste out of landfills, which helps stop methane from being released. The EPA says landfills are a big source of methane in the U.S. Plus, the compost we make can feed our gardens, closing the loop of sustainable growth and waste handling. As city gardeners, we play a big part in composting and cutting down on waste. Next, we’ll look at new ways to compost in small spaces. These methods help us use every inch wisely and make our cities greener and more resilient. No-Till Gardening: A Solution for Small Spaces City gardeners face a big challenge with limited space. No-till gardening is a great way to make healthy, productive gardens. It uses cover cropping and lasagna beds to work well in small spaces. No-till gardening is good for soil health. Tilling can release a lot of carbon dioxide, more than human emissions in 2016. No-till systems help fix compacted soils and add carbon back to the earth. No-till gardening also helps soil ecosystems. Gardeners use black plastic tarps, compost, and cover crops to fight weeds and improve soil. This creates a warm, moist soil layer that helps with weed control and soil health. For gardeners with little space, no-till techniques like root maker pots are a big help. These pots, around $7 each, stop roots from growing too long. They’re perfect for patios or small gardens. They might give a bit less yield than raised beds, but they’re very convenient. By using no-till gardening, city gardeners can make the most of their small spaces. They can create gardens that are good for the environment and help them grow their own food. The Composting Cannon: An Innovative Approach City gardeners can now compost easily with the Composting Cannon. This Australian invention lets you turn organic waste into rich compost in your small garden or urban area. How the Composting Cannon Works The Composting Cannon has a special design. It’s a buried cylinder that breaks down food scraps and yard waste. It uses worms to turn your waste into compost. A set of three cylinders can make over 60 kilograms of waste into garden soil. Step-by-step Guide to Using the Composting Cannon Bury the Composting Cannon cylinder in your garden or a small outdoor space. Add your food scraps, yard trimmings, and other organic matter to the cylinder. Keep the system balanced by adding dry matter, like shredded paper or cardboard, now and then. After about 4 months, the compost is ready. Just dig it up and use it to feed your plants. The Composting Cannon is easy and no-maintenance. Just bury it in your garden, and it turns waste into plant food. You don’t need to keep checking on it or turning it. With the Composting Cannon, even small city gardens can compost. It helps make waste management more sustainable and circular. Other Composting Solutions for Small Urban Gardens Composting in tiny city gardens can be tough, but there are many new ways to tackle it. Urban gardeners can look into compact systems like the Compot buried composting system. This method buries a container to make compost right in the garden. Compot Buried Composting System The Compot system puts a special compost container underground. This way, it breaks down organic matter without using up much space. It’s perfect for small gardens because it blends into the landscape easily. Tumbleweed Compost Tumbler The Tumbleweed Compost Tumbler is great for city gardeners. It’s a barrel that you can turn to mix the compost. This saves space, especially for those living in apartments with little outdoor area. Bokashi Fermentation for Kitchen Waste Bokashi fermentation lets gardeners compost meat and dairy by using special microorganisms. It breaks down kitchen waste without any bad smells. This is great for small spaces where regular composting doesn’t work well. Hungry Bin Continuous-Flow Worm Farm The Hungry Bin is a small, moving worm farm for vermicomposting. It gives you a steady supply of nutrient-rich compost. It’s perfect for city gardeners with little space, fitting into
The Ultimate Guide to Vertical Gardening in Small Apartments 2024 Edition
Hey guys its JV Charles. Ive got great news! You dont have to give up on your green thumb dreams because of limited space. Vertical gardens let even the smallest apartments become lush, green havens. How about them apples/ So, if you love plants, get ready to explore vertical gardens and see how they can save space. Ive put together a great article I hope you love it! Key Takeaways Vertical gardening lets you use every inch of indoor space to grow a garden. Picking the right plants and knowing how much light they need is key for a successful vertical garden in small spaces. Vertical gardens can make your living area look better, clean the air, and support more life. Building your own vertical garden and following expert care tips will help you keep it healthy and lasting. Looking at examples of vertical gardens can inspire you and help you plan your own urban garden. Introduction to Vertical Gardening The idea of vertical gardening goes way back to ancient times. The Hanging Gardens of Babylon were a prime example of this. How cool is that? Fast forward to the 20th century, and French botanist Patrick Blanc introduced the modern vertical garden, also known as the living wall. Definition and Concept of Vertical Gardening Vertical gardening means growing plants on a panel that hangs vertically. It turns walls and surfaces into a green oasis. It’s perfect for those who love plants but have little space. Brief History of Vertical Gardens The Hanging Gardens of Babylon are among the earliest known vertical gardens. In the 20th century, French botanist Patrick Blanc made a big leap forward. He created the modern living wall. Sounds a little crazy huh? Types of Vertical Gardens Living Walls: These gardens feature a variety of plants mounted on a wall, creating a living piece of art. Green Walls: A green wall is similar to a living wall but uses artificial plants instead of real ones. Not me cup of tea but still cool. Right? Pocket Gardens: These gardens use individual pockets to hold plants and can be easily attached to walls or other vertical surfaces. Vertical gardening is a great way for city folks to add more greenery to their homes. It lets people turn walls into gardens. This way, they can enjoy a lush environment without giving up floor space. Benefits of Vertical Gardens Vertical gardening is a big change for city folks wanting to use space wisely. These gardens save space and bring many benefits that make life better. Let’s look at how vertical gardens help in small apartments. Space-saving for Urban Dwellers Vertical gardening is great for saving space. In cities where space is tight, these gardens use walls and fences to grow plants. This lets city gardeners have a green space without losing floor space. Enhanced Aesthetics Vertical gardens are not only functional but also visually stunning. They turn dull spots into eye-catching areas, adding natural beauty to any space. The plants and flowers make the area calm and refreshing, making the living space better. Improved Air Quality Plants clean the air, and vertical gardens do this too. They remove pollutants and make the air cleaner, making your home healthier. By having different plants, these gardens help local wildlife and improve the air quality. Increased Biodiversity Vertical gardens support many species, from flowers to vines. This variety attracts pollinators and other helpful animals. It makes the city environment healthier and more interesting. Reduced Energy Consumption These gardens also help control building temperatures, cutting down on heating and cooling costs. Green walls, with their plants, act as insulation. This keeps the inside of buildings comfortable and lowers energy use. Adding vertical gardens to small apartments brings many benefits. They save space, make places look better, and clean the air. These solutions are changing how we live in cities. Choosing the Right Plants for Your Vertical Garden Choosing the right plants is crucial for a thriving vertical garden in small apartments. With limited space, vertical gardens let you grow many types of plants. Let’s look at what to think about when picking plants for your garden. We’ll also suggest some great options to make your small space look lush and green. Factors to Consider When Selecting Plants For a successful vertical garden, think about these key points: Light requirements: Check how much sunlight your garden gets. Some plants love full sun, while others do well in shade or low light. Growth habits: Pick plants that grow well up high, like climbers or compact ones that won’t take over. Maintenance needs: If you’re new to gardening or busy, choose plants that are easy to care for. Recommended Plants for Vertical Gardens With the right plants, your vertical garden can be both beautiful and useful. Here are some top picks: Succulents: These plants are perfect for vertical gardens because they need little water and have small roots. Ferns: Ferns have beautiful fronds and do well in low light, making them great for vertical gardens. Climbing plants: Vines like ivy and jasmine cover well and add elegance to your garden. Edible plants: You can grow your own food in a vertical garden. Try adding herbs, strawberries, or small tomatoes. Now were talking? By picking plants that fit your garden’s conditions, you can have a beautiful and productive vertical garden. Think about light, growth, and care needs for success. DIY Vertical Garden Ideas and Tutorials Vertical gardening is a great way for city folks with little space to grow plants. By using walls and other vertical spots, we can make the most of our space. We’ll look at different DIY vertical garden ideas and how-tos for various tastes and needs. Pallet Garden Give an old wooden pallet a new life as a vertical garden. Just layer it with landscape fabric and fill the spaces with soil. Put your favorite plants in the pallet slats. Then, hang it on a wall or fence for a beautiful, space-saving garden.
No-Till Gardening in Apartments: Indoor Solutions for Green Living
Howdy yall its JV Charles with ya. Bringin another cool article I hope you will love! Did you know nearly 50 percent of the world’s people live in cities now? This fact shows we need new ways to bring nature into our homes. Luckily, with a few easy changes, people living in apartments can have their own gardens. They can also live more sustainably, even with little space. Super cool! Key Takeaways: Apartment gardening lets you grow your own food and add plants to small areas. Vertical gardening, container gardening, and hydroponic systems work well for city folks. Using composting and saving water can lessen your impact on the planet. LED grow lights and efficient appliances make your apartment greener. Adding renewable energy and recycling boosts your green living efforts. We’ll look at nine easy tips for a sustainable, eco-friendly home in your apartment. These include using energy-saving light bulbs and appliances, recycling, saving water, insulating, and more. By making these small changes, we can lessen our environmental impact. And we can still enjoy the perks of living green, even in small spaces. Eco-Friendly Light Bulbs and Energy-Efficient Appliances Swapping old light bulbs for LED bulbs is an easy way to make your apartment greener. LEDs use up to 80% less energy than traditional bulbs and last much longer. This means you’ll use less electricity and pay less on your bills. Also, choosing Energy Star certified appliances for your home can make a big difference. These appliances use less energy, helping you save money and the planet. Switching to LED Bulbs and Energy Star Appliances LED bulbs don’t just use less electricity; they also produce less heat. This helps you save even more energy. Studies show that using LED bulbs can cut your electricity bills by up to 50%. For appliances, Energy Star certified ones use 10-50% less energy than others. So, you get the same benefits but pay less each month. Reducing Energy Consumption and Lowering Utility Bills Using eco-friendly lighting and appliances can really lower your utility bills. Homes that switch to LEDs and Energy Star appliances can save $100-$300 a year. These changes are easy to make and help the environment. Plus, they make your energy bills more manageable over time. Energy-Efficient Upgrade Estimated Annual Savings Switching to LED light bulbs $50-$100 Upgrading to Energy Star appliances $50-$200 Combined LED bulbs and Energy Star appliances $100-$300 Switching to eco-friendly lighting and appliances is a smart move for a greener home and lower bills. These small changes can make a big difference. Enjoy a more comfortable and eco-friendly living space by taking these steps. Renewable Energy Sources for Apartment Dwellers We might not have the chance to install solar panels or big renewable energy projects. But, we can still help grow the use of renewable energy, green energy, and clean energy. By using new services, we can make sure our apartment living is powered by eco-friendly sources. Companies like Arcadia Power and Clean Choice Energy let us get our electricity from renewable energy sources without extra cost. By signing up, we can be sure our apartments are using wind, solar, or other green energy sources. This helps cut our carbon footprint and supports the clean energy industry. These services work well with our current utility providers. This means we can switch to renewable energy without changing our daily routines. It’s an easy yet powerful way for us, as apartment dwellers, to help move towards a greener future. Renewable Energy Source Advantages Challenges in Apartment Living Solar Power Abundant and renewable resource Reduces reliance on fossil fuels Lowers energy bills in the long run Limited roof space in apartments Potential restrictions from landlords or homeowners associations High initial installation costs Wind Power Renewable and abundant resource Generates electricity without emissions Potential for off-grid solutions Limited space and access to wind in urban areas Zoning restrictions and approval requirements Noise and visual impact concerns Geothermal Energy Consistent and reliable energy source Reduces reliance on fossil fuels Long-term cost savings on energy bills Challenging to install in existing apartments Upfront installation costs can be high Limited access to suitable geological conditions By using these new renewable energy solutions, we can help make a big change towards a sustainable future. And we can do it all from our apartment living spaces. Recycling and Composting Solutions for Small Spaces In our eco-conscious world, even apartment dwellers can make a difference. By using recycling and composting strategies, we can reduce waste and help the planet. Even without curbside recycling, there are other ways to recycle and compost. Recycling Strategies for Apartment Living If your apartment doesn’t have recycling, don’t worry. You can recycle by finding drop-off points or centers that take recyclables like paper, plastic, glass, and metals. Some places offer vouchers or discounts for recycling. You can also talk to your landlord about starting a recycling area in your building. Composting Options for Indoor Gardening Composting is great for reducing food waste and making soil for small gardens. Even in a small apartment, you can compost. You can use a tumbler bin on your balcony or an indoor system. The EPA says you can compost things like fruit and vegetable scraps, coffee grounds, eggshells, and paper. Composting can take a few months to a year, depending on your bin and how often you add materials. When your compost is ready, it should look earthy, not hot, and not wet or clumpy. Try to save some finished compost to keep the cycle going. By recycling and composting, we can cut down on landfill waste. This helps us live more sustainably, even in small spaces. Water Conservation with Efficient Showerheads Living in apartments, we always look for ways to be more eco-friendly and lessen our impact on the planet. Upgrading to a high-efficiency showerhead is a simple yet powerful step. These showerheads give us a good water flow but use much less water than old ones. On average, showers use 20 to 40 gallons
Vertical Garden Kits: Comparison of Top Brands for Urban Spaces
Hey guys its JV Charles . This is going to be a super cool look at vertical gardens. Did you know a single vertical garden system can hold up to 51 plants? This fact shows how vertical gardening saves space, perfect for city living. We’ll look at the best vertical garden kits available. We’ll compare their features, prices, and what users think to help you pick the right one for your space. Key Takeaways Vertical garden kits are a great way to grow herbs, veggies, and flowers in small spaces. Brands like Rise Gardens, Lettuce Grow, and Gardyn offer systems that fit many plants in a little space. Prices for these kits range from $160 to $2,800, with smaller ones costing about $699. When picking a vertical garden kit, think about how many plants it holds, how easy it is to set up, how much upkeep it needs, and the cost of the plant pods. Vertical gardening also helps the environment by boosting biodiversity and improving air quality in cities. What is a Vertical Garden Kit? Vertical garden kits are special gardening systems that help use space well, indoors or outdoors. They let you grow herbs, veggies, and small fruits up high, using hydroponic or soil-less methods. These kits come with everything you need, like grow lights, watering systems, and pots. The real deal here ! Defining Vertical Garden Kits For city folks, vertical garden kits are a great way to grow your own food and flowers in small spaces. They use vertical space to grow plants, making the most of every inch. This way, you can grow more plants in a small area. Benefits of Urban Vertical Gardening Maximizes limited indoor or outdoor space Enables the cultivation of a wide variety of herbs, vegetables, and small fruits Provides a source of fresh, homegrown produce in urban environments Helps improve air quality, offer insulation, and enhance the aesthetic appeal of a space Vertical gardening is perfect for cities where space is scarce. It lets city people grow their own food and flowers in tiny spaces. Plus, it can make the air cleaner, keep your space warm, and make it look better. Super cool. “Vertical gardening is a game-changer for urban living, allowing even the tiniest of spaces to become thriving oases of fresh, homegrown goodness.”-JV Charles, Founder Garden Josiah Rise Gardens: The Rise Garden The Rise Garden is a modular, hydroponic vertical gardening system. It can hold up to 36 plants per level. It’s perfect for individuals, couples, or even families, making it easy to grow fresh greens and herbs in small spaces. The system comes with a mobile app that helps with planting and care, making gardening easy. People love how easy the Rise Garden is to set up and how it keeps pests away. This means you get a steady supply of nutrient-rich produce. The hydroponic design uses water-based nutrients instead of soil. This cuts water use by up to 95% and helps plants grow faster and healthier. The Rise Garden is also modular, letting you customize it for your space. Whether you have a tiny balcony or a big indoor area, you can adjust the system to fit. You can grow between 8 and 36 plants per level. “The Rise Garden has been a game-changer for our family. We’ve been able to enjoy a consistent supply of fresh, flavorful greens and herbs without the hassle of traditional gardening. The app makes it so easy to care for the plants, and we love how compact and versatile the system is.”- Samantha Owens, Urban Gardner The Rise Garden is a hit with urban gardeners who want to grow their own food at home. It offers a lot of benefits, like a big harvest and being eco-friendly. It’s a great choice for those wanting to try vertical gardening in their homes. Lettuce Grow 18 Plant Farmstand The Lettuce Grow 18 Plant Farmstand is a stylish and versatile vertical garden. It works both indoors and outdoors. Made from ocean-bound plastic, it supports up to 18 plants with just 15 minutes of weekly care. Many customers have seen great results growing greens and herbs with it. This garden costs $399, with a 16% discount now. It fits 18 to 36 plants, perfect for city living with little space. Starting an indoor setup requires grow lights, which add $200 and need 14 hours of daily use. Feature Lettuce Grow 18 Plant Farmstand Gardyn 3.0 Hydroponics Growing System Click and Grow The Wall Farm Indoor Vertical Garden Price $399 (16% discount) $695 (23% discount) $2,800 Plant Capacity 18 to 36 plants 30 plants 51 plants Maintenance 15 minutes per week No tools required for assembly – User Reviews – 4-star rating on Amazon with 400+ reviews – Weekly pH tests and a deep clean or reset every four months are needed for the Farmstand. Seedlings from Lettuce Grow are $12 for six, plus $8.99 shipping. The indoor setup might increase your electricity bill by 15 cents a day. To fight pests, use Mosquito Bits and Neem Oil, and quarantine new plants for a few days. Top off the base water weekly and fully refill and clean it every four months with hydrogen peroxide. The Lettuce Grow 18 Plant Farmstand is a stylish and practical choice for city gardeners. It has many features and options to meet your needs. Gardyn 3.0 Hydroponics Growing System The Gardyn 3.0 Hydroponics Growing System is a compact, hydroponic vertical garden. It fits up to 30 large plants in just 2 square feet. It’s perfect for small spaces in cities. The system includes seeds, LED grow lights, and a water tank. You can also get personalized care tips from the brand’s AI gardening assistant. Space-Saving Design The Gardyn 3.0 has a compact, vertical design for small spaces. Its parts like columns, yPods, Pod Caps, and the water tank are safe and durable. They’re made from food-grade ABS plastic. The lid is made from Hevia wood, adding a natural touch.
10 Exciting DIY Gardening Projects to Try in 2024
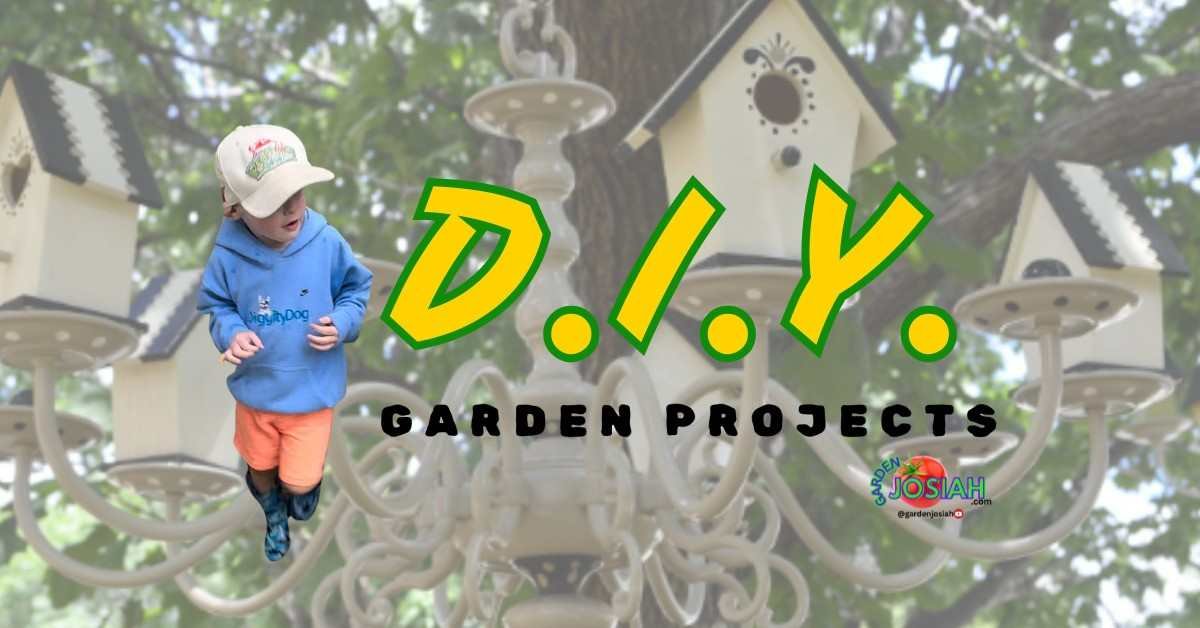
Hey guy its JV Charles. Did you know 30% of the latest DIY gardening trends focus on making birdhouses and feeders? Whether you have a big backyard or a small patio, there are endless ways to make your outdoor space special. Get ready to show off your design skills and start making your garden eco-friendly in 2024. We have 10 inspiring DIY gardening projects for you. Some might be a little corny but alot of fun. They range from upcycling to adding water features. Get creative and make your backyard show off your unique style1. Why noy have a little fun ? Key Takeaways 30% of the latest DIY gardening projects focus on creating bird-related decorations2 40% of the projects involve repurposing or upcycling materials2 20% of the projects require woodworking skills2 10% of the projects are specifically designed for children2 15% of the projects feature the reuse or repurposing of various materials2 Are you ready to get your hands dirty and change your outdoor space? Let’s explore these exciting DIY gardening projects. They’ll make your friends and neighbors amazed3. Birdhouse Chandelier: A Whimsical Abode for Feathered Friends Birdwatchers and nature lovers will love this birdhouse chandelier project. It turns an old chandelier into a cozy home for birds4. Hang it in your backyard, and it will draw in songbirds from all around. Materials Needed: Old Chandelier Lumber or Prefabricated Birdhouses This project is a fun way to give an old chandelier new life. You can attach birdhouses to it, making a piece that’s both beautiful and useful. You can use either store-bought or handmade birdhouses, making it a unique addition to your yard. “The birdhouse chandelier is a unique and eye-catching way to provide a safe haven for our feathered friends while adding a touch of whimsy to your outdoor decor.” – Birdhouse enthusiast Place your birdhouse chandelier where it can be seen, like in a tree or on a post. It will become a busy spot for birds of all kinds5. This DIY project is a great way to bring more birds to your yard and enhance your outdoor space. Colorblock Bird Feeders: Upcycling Tennis Ball Tubes If you play tennis, you might have old tennis ball tubes. Don’t throw them away. Turn them into colorful bird feeders6. Use popsicle sticks and paint to make them fun and useful7. Turning tennis ball tubes into bird feeders is a great way to make your garden more interesting6. It’s also a way to be creative and reuse items you might have thrown away7. Start by thoroughly cleaning the tennis ball tubes to remove any residue. Cut popsicle sticks into various lengths and glue them onto the tubes, creating a vibrant, geometric pattern. Add a few coats of acrylic paint in your desired colors to the popsicle stick accents. Punch a hole near the top of the tube and thread through a piece of twine or wire for hanging. Fill the tubes with bird seed and watch as your feathered friends flock to your colorful new creations. This project is a great way to make your garden more personal and help the birds7. With some creativity, you can turn old tennis ball tubes into unique bird feeders2. So, grab those tennis ball tubes and show off your artistic side6! Making colorblock bird feeders is a fun and green way to beautify your yard and help the birds7. Let your creativity flow and enjoy the birds that will visit your new feeders2. Backyard Stream: Bringing Nature’s Tranquility to Your Oasis Imagine the soothing sound of running water in your backyard. With a DIY backyard stream project, you can bring nature’s calm to your doorstep8. Gardens are key to keeping our mental health strong. By adding a pond liner, pump, and plants, you can make a beautiful water feature. This will change your outdoor area into a peaceful oasis8. Materials Needed: Pond Liner, Pump, Rocks, Plants To start this project, gather a few important items. First, get a strong pond liner for the stream’s base9. Next, add a pump to keep the water moving. This creates a calming sound10. Choose rocks of different sizes to line the stream, making it look natural9. Pick plants like cattails or water lilies to add color and texture9. With these items, you can turn your backyard into a peaceful oasis10. Add elements like brick patios and granite pavers for a beautiful look. Choose plants that like the shade or can handle little water for a complete outdoor space10. Soon, you’ll enjoy the peaceful sounds and look of your DIY backyard stream. Plant Name Characteristics Care Requirements Lavender Fragrant purple flowers, gray-green foliage Full sun, well-drained soil Green Beauty Boxwood Evergreen shrub with glossy green leaves Partial shade to full sun, well-drained soil Lavender Swirl Trailing Lantana Vibrant purple and yellow flowers, trailing habit Full sun, drought-tolerant Forest Pansy Redbud Deciduous tree with purple-red foliage Full sun to partial shade, moist but well-drained soil “The cool vibes it generates will be well worth the effort.”-JV Charles, Founder Garden Josiah Adding a DIY backyard stream can make your outdoor space a peaceful escape8. With the right materials and planning, your backyard can become a calm place. Here, you can relax, connect with nature, and enjoy the sound of flowing water9810. Aluminum Chair Makeover: Reviving Old Chairs with Paracord Give old, weathered aluminum chairs a fresh look with a paracord makeover. Use colorful paracord or macrame cord to weave through the chair frames. This makes a stylish and strong outdoor seating option for any garden or patio. It’s a simple and affordable way to turn old furniture into a beautiful piece for your outdoor space. Start by cleaning the chairs to remove dirt or rust. Then, lightly sand the surfaces to help the paracord stick better11. Measure the chair frames and cut your paracord to the right lengths. For a 10.5-inch square chair, you’ll need about 110 feet of yellow cord and 165 feet of black cord11. Weave the
DIY backyard landscaping projects to enhance curb appeal
Hey guys its JV Charles. As the seasons change and flowers bloom, our backyards become a canvas for our unique style. They become a welcoming oasis. Whether you’re experienced or new to DIY, the joy of changing your outdoor space is unmatched. Let’s dive into some exciting DIY backyard landscaping projects. These can boost your home’s curb appeal and make your neighbors jealous. Key Takeaways Discover budget-friendly DIY landscaping ideas to enhance your home’s curb appeal Explore layered landscaping techniques to create depth and visual interest Learn how to build custom outdoor furniture and incorporate greenery for privacy Understand the importance of lighting and outdoor living spaces for a cohesive design Gain inspiration to transform your backyard into a personal oasis Introduction to DIY Backyard Landscaping Turning your backyard into a beautiful and useful outdoor area can boost your home’s look and value. With some DIY landscaping projects, you can make a backyard oasis that shows off your style. These simple ideas are great for both beginners and pros, making your home look better and more appealing. Benefits of DIY Landscaping Projects DIY landscaping has many perks. It can save you money and let you make your outdoor space your own. You’ll feel proud of your work. Plus, it can make your home look better, raise its value, and give you a sense of achievement. It’s also a fun hobby that connects you with nature and encourages an active lifestyle. Popular Backyard Landscaping Trends When starting your DIY backyard landscaping, keep up with the latest trends and ideas. Ive got a few right here. Some top trends include: Layered Landscaping: Use different plant heights, textures, and colors to add depth and interest. Outdoor Living Spaces: Create areas for entertaining, relaxing, and dining outside. Incorporating Greenery and Privacy: Use trees, shrubs, and hedges to make your space look better and more private. Landscape Lighting: Add lights to highlight certain features and make your backyard warm and welcoming at night. By following these trends, you can make your backyard a beautiful and useful outdoor space. It will not only make your home look better but also give you and your family a place to relax and have fun. Ahhh Yahhh! Layered Landscaping Techniques Layered landscaping can really change how your backyard looks. By arranging plants at different heights, you add depth and make your outdoor area look more sophisticated. Oh so cool! Begin by placing taller plants like shrubs and trees at the back. This creates a lush background for your garden. Then, use medium-sized plants in the middle and low-growing plants up front. Contrast is important in layered landscaping. Mix different types of plants, like coneflowers and peonies, for interesting textures. This stops your garden from looking flat. Try out different flower beds, shrubs, and perennials to find the right layered look. Focus on plant heights and textural contrast to boost your backyard’s visual depth. “Layered landscaping is like creating a masterpiece with your plants. It’s about playing with height, texture, and color to craft a truly captivating outdoor space.” Using these layered landscaping tips, you can turn your backyard into a beautiful oasis. It will show off your gardening skills and personal style. Get ready to wow your neighbors and boost your curb appeal. “DIY Backyard Landscaping Projects to Enhance Curb Appeal” DIY backyard landscaping projects can greatly improve your home’s curb appeal. You can design eye-catching walkways and create custom house number signs. These projects can transform your outdoor space and make a strong impression on visitors and potential buyers. Building a stunning walkway is a key project. Use pavers, gravel, or repurposed materials to make a unique path. This not only looks great but also provides a solid path to your front door. Now were talking! Constructing a retaining wall is another big project. These walls prevent soil erosion and add visual interest. Choose from natural stone, stacked bricks, or concrete blocks to make your wall stand out. Don’t overlook the small details that can make a big difference. Customizing a modern house number sign or adding DIY window boxes with flowers can boost your home’s curb appeal. These touches can greatly improve the first impression your home makes. By doing these DIY projects, you can change your outdoor space and make your home more appealing. So, get ready, get your hands dirty, and create a backyard oasis that will catch everyone’s eye. So cool! A well-designed and maintained backyard not only looks good but can also increase your home’s value. So, let your DIY spirit shine and explore ways to improve your outdoor living space. Outdoor Living Spaces and Furniture Make your backyard better with DIY projects that make outdoor living spaces inviting. You can build a cozy patio or install a charming pergola. These projects are budget-friendly and stylish, making your outdoor space better. DIY Patio and Pergola Ideas Creating a patio is a great way to have a special spot in your backyard. Use pavers, reclaimed wood, or repurposed pallets for a unique patio. Add a pergola for elegance and shade. Hang plants, string lights, or a retractable shade cover for extra style. Building Outdoor Furniture Make your outdoor spaces better with custom furniture. Turn old items into a stylish ottoman, a rustic coffee table, or a cozy Adirondack chair. Aluminum furniture is light and doesn’t rust, making it perfect for outdoors. Teak furniture lasts a long time and stands up to the weather. PVC or resin furniture is affordable and good for mild weather. Wrought iron is strong but needs painting to stay looking good. Keep that in mind. With DIY projects, you can change your backyard into a beautiful oasis. A bit of creativity and hard work can make your outdoor space amazing. Enjoy the benefits of outdoor living and custom furniture. “Outdoor living spaces have become an extension of the home, offering a retreat for relaxation, entertainment, and connection with nature.”-JV Charles Incorporating Greenery and Privacy Many homeowners want a lush
Sustainable Gardening in 2024: Eco-Friendly Practices for a Greener Garden
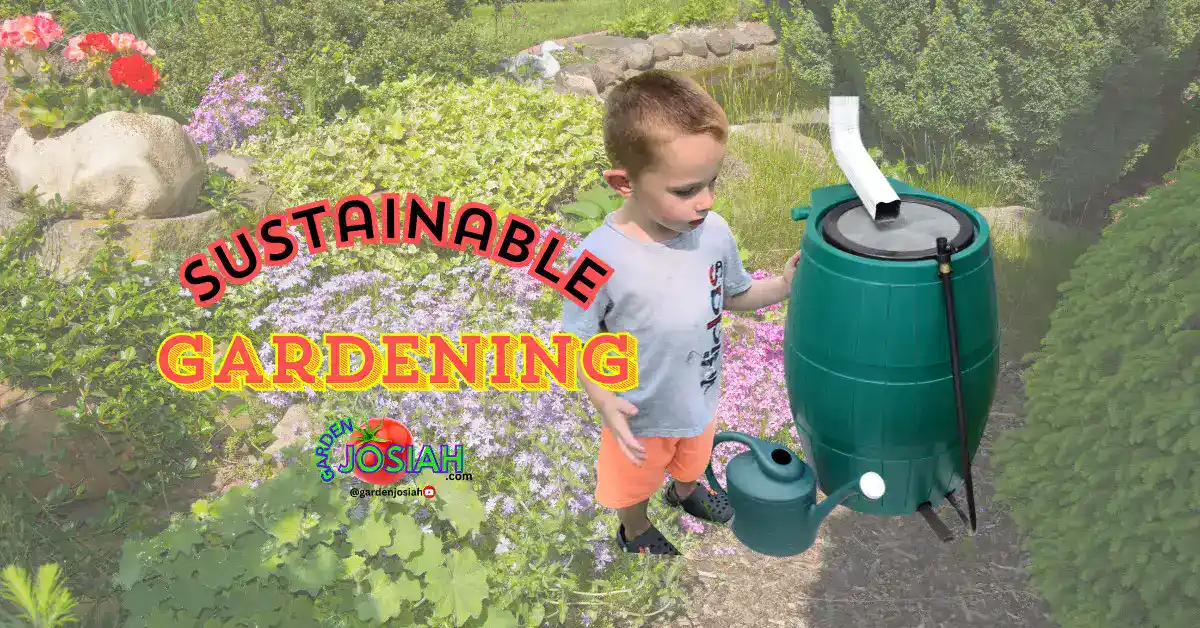
Hey guys its JV Charles. Did you know that Google Trends shows more people are searching for “sustainability” every year1? This shows we’re all getting more interested in making our gardens eco-friendly. How exciting! With over 20 million gardens in the US, we can make a big difference by gardening sustainably. Im pumped! Can you tell? In 2024, we’re focusing more on sustainable gardening to lessen our environmental impact. We want our gardens to be good for the planet and beautiful too. This article will share the best ways to make your garden eco-friendly. I want me boys to have a place to garden as they grow up ya know? Key Takeaways Sustainable gardening practices can significantly reduce carbon emissions, water usage, and reliance on synthetic fertilizers. Utilizing native plants, composting, and implementing water-efficient irrigation methods are just a few of the impactful eco-friendly strategies. Sustainable landscaping techniques, such as minimizing lawns and embracing permeable surfaces, can enhance the overall environmental benefits of your garden. Integrated Pest Management and polyculture farming help create a thriving, self-sustaining garden ecosystem. Community involvement and educational initiatives can promote the adoption of sustainable gardening practices on a wider scale. Embracing Sustainable Gardening: A Greener Path Forward As we enter 2024, let’s make sustainable gardening our goal. Or at least one of them . By using eco-friendly methods, we can save water, cut down on harmful chemicals, and boost garden life2. Really it’s not so hard. Start by checking how your garden affects the environment. Look at your gardening habits and see where you can be greener2. Think about how much water and chemicals you use, and the variety of plants you have. This will help you set goals and plan a greener garden. Water conservation is key in sustainable gardening3. Did you know only 1% of the world’s water is safe for us to drink? We need to use water wisely and use rainwater to cut down our water use3. Using native plants is another way to garden sustainably2. These plants fit well with our local climate and need less care. Adding them to your garden brings in more pollinators and helps the ecosystem. Sustainable gardening helps our community too2. Join local gardening groups or seed swaps to share tips and encourage others to go green. We can all work together to make our areas better for the planet. By choosing sustainable gardening, we help our environment and the future3. Let’s start making our gardens greener, one step at a time. Assessing Your Garden’s Environmental Impact Understanding the environmental impact of our gardens is key to sustainable gardening. By looking at our garden’s footprint, we can set goals for a greener future. Setting Clear Sustainability Goals Start by checking how much water you use and your use of chemicals. Do you save water or use rainwater?86% of urban gardeners saving water saw less water use4. Also,68% of gardens using rainwater cut their water bills by 25%4. Look at your soil health and how your gardening affects plants.79% of suburban gardens improving soil health saw better plant growth4. This helps you see where to improve and set garden goals. Creating a Personalized Eco-Friendly Garden Plan Make a plan based on your garden and goals. Use plants that fit your area and reduce water, fertilizers, and pesticides.72% of gardeners found native plants cut down on irrigation and chemicals4. Adding compost and mulch also helps soil and saves water. By focusing on sustainability, your garden can help the local ecosystem.Urban gardens with wildlife support saw more pollinators4. Sustainable gardens also reduce plastic waste by 40%4. “Sustainable gardening is not just about growing beautiful plants; it’s about creating a harmonious relationship between our gardens and the environment.”-JV Charles, Founder Garden Josiah Every step towards sustainability matters. Assessing our garden and making eco-friendly plans helps us all towards a greener future. Incorporating Sustainable Garden Design Elements Looking ahead to 2024, sustainable garden design is becoming key. By adding eco-friendly hardscaping, water-wise layouts, and features for wildlife, we make our gardens beautiful and eco-friendly5. More landscape designers are now focusing on green infrastructure in their work5. This move towards sustainability shows in the use of smart irrigation and energy-saving lights. These help lessen our gardens’ impact on the environment5. Xeriscaping, collecting rainwater, and using native plants are getting popular. People want to make gardens that use less water5. Using permeable paving and green roofs is becoming more common. These help lessen the harm caused by hard surfaces like concrete5. Adding solar-powered lights is becoming more common in gardens. This cuts down on carbon emissions5. Sustainable landscaping is good for the planet and helps with water saving, soil health, and cuts down on upkeep costs6. By going green, we make gardens that are lively, easy to care for, and bring in wildlife. This also makes our communities healthier5. Sustainable Garden Design Trend Percentage Increase/Decrease Incorporation of edible plants, herbs, and fruit trees 7 Adoption of eco-friendly practices (rainwater harvesting, permeable paving, green roofs) 6 Usage of native plants in landscaping projects 5 Designated areas for vegetable gardens, pollinator habitats, and rain gardens 5 As we move forward with sustainable garden design, we can make outdoor spaces that improve our health and help the planet. By choosing wisely in our garden designs, we can make a positive change for the environment6. “Sustainable garden design is not just about aesthetics; it’s about creating a harmonious relationship between our outdoor spaces and the natural world around us.” Cultivating Native Plants: Nature’s Wisdom Choosing native plants for your garden is a smart move for 2024. These plants grow well in our local climate and ecosystems. They need less water and care8. The popularity of native plant gardens has grown a lot in the last 10 years and is still on the rise8. Benefits of Native Plants for Sustainable Gardening Native plants are not just pretty; they’re great for the planet too. They use less water than other plants8. In 2024, people are focusing on


