

Sow 8 Brilliant Bloomers Now for Your Best Garden Spring is the perfect time to refresh your garden with vibrant colors and delightful scents. Choosing the best annual flowers to start in spring can transform your outdoor space into a blooming paradise. These spring annual flowers not only bring a burst of color but also contribute to a lively atmosphere, providing joy throughout the season. By carefully selecting colorful annual flowers for spring planting, you can ensure that your garden thrives and offers beauty year after year. This article delves into the selection and care of these splendid blooms, guiding you on the journey to achieving your dream garden. Key Takeaways Spring is ideal for planting a variety of annual flowers. Choosing the right blooms can enhance your garden’s appeal. Colorful annual flowers ensure a lively atmosphere throughout the season. Proper care will help your selected flowers thrive and last. Explore various options before deciding on your favorites. Introduction to Annual Flowers Annual flowers are a great choice for making your garden bright all season. They grow, bloom, and complete their life in just one year. This makes them perfect for adding color to your garden every spring. Spring-blooming annual flowers bring instant beauty to your garden. They fill in gaps and offer many designs for different tastes. With so many colors, shapes, and sizes, you can find the perfect fit for your garden. Design a bed of zinnias or a line of marigolds with annual flowers. They make your garden lively from spring to late summer. These plants are easy to plant and care for, even for beginners. Benefits of Planting Annual Flowers in Spring Spring brings a lively change to gardens. Planting annual flowers in this season can make your outdoor space thrive. These plants grow fast and bloom a lot, making them a favorite among gardeners. Seasonal Advantages Annual flowers bloom quickly in spring. By picking the best ones, gardeners get an early splash of color. These flowers not only look great but also help bees and butterflies, which are key to a healthy garden. Impact on Garden Aesthetics Annual flowers make gardens look amazing. They keep blooming all spring and summer, changing your garden’s look. Homeowners can make their gardens stand out, improving curb appeal and bringing joy to visitors. So, planting annual flowers does more than just make your garden look good. It also makes it lively and colorful, exciting the senses with different colors and smells. Best Annual Flowers To Start In Spring Choosing the right annual flowers for spring can greatly enhance your garden. The best spring annuals are not only hardy but also come in a variety of colors and shapes. This variety ensures that your garden will be beautiful all season long. Variety Overview There are many annual flowers to choose from for spring. Here are some popular ones: Petunias – Known for their vibrant colors and long blooming period. Marigolds – Easy annual flowers for spring that are resistant to pests and add gold and orange hues to your garden. Snapdragons – Offer a unique shape and come in many colors, suitable for vertical interest. Zinnias – Loved for their bold colors and ability to attract pollinators. Choosing Your Favorites When picking your favorites, think about a few things: Color Palette – Pick flowers that match your garden’s colors. Growth Habit – Decide if you want low-growing flowers or taller ones. Local Climate – Some flowers like it warm, others cool. By considering these factors, you can pick the best spring annuals for your garden. This ensures your garden looks great all season. Flower Type Light Requirements Height Bloom Time Petunias Full Sun 10-18 inches Spring to Fall Marigolds Full Sun 6-24 inches Spring to Frost Snapdragons Full Sun to Partial Shade 12-48 inches Spring to Summer Zinnias Full Sun 12-36 inches Summer to Fall Top 8 Colorful Annual Flowers for Spring Planting Spring is the perfect time to add color to your garden with the top colorful annual flowers for spring. These plants offer stunning blooms and are among the most popular spring bloomers. They are essential for any gardener. Here are eight delightful options for your vibrant garden. Petunias Petunias come in a wide range of colors, from bright purples to soft pastels. They love full sun and well-drained soil. Regular deadheading keeps them blooming, making them a must-have for seasonal displays. Marigolds Marigolds are known for keeping pests away and their bright yellow and orange colors. They grow well in different soils and handle direct sunlight. Gardeners love them for companion planting. Snapdragons Snapdragons are unique with their flower shapes and colors. They stand tall and elegant in gardens. These hardy annuals do well in cooler temperatures and need regular watering. Zinnias Zinnias attract butterflies with their long-lasting blooms, adding life and color to your garden. They thrive in full sun and well-drained soil. They require minimal care for a stunning display. Cosmos Cosmos are great for beginners because they are easy to care for. These flowers bloom profusely and grow well in poor soil. They are perfect for low-maintenance gardens and add a soft touch to arrangements. Sunflowers Sunflowers are iconic for their tall height and cheerful look. They need full sun and well-drained soil. Their bright yellow petals can brighten up any space. Geraniums Geraniums are tough and adaptable, fitting well in containers and garden beds. They grow well in various conditions. They offer bright and bold blooms from spring through fall. Begonias Begonias are known for their colorful flowers and unique foliage. These shade-tolerant plants are perfect for adding dimension to gardens. They brighten up darker corners with their vibrant colors. How to Prepare Your Garden for Annual Flowers Getting your garden ready for annuals is key for beautiful spring blooms. Start by testing your soil to check its pH and nutrient levels. This step tells you what your soil needs to grow healthy plants. Clear out last season’s debris to avoid diseases that can harm new plants. This is a must-do to keep your garden healthy. Adding organic compost to your soil boosts

Top 10 Flower Seeds To Sow In May For A Joyful Summer Garden Bursting With Color
May is the perfect time for flower gardening as spring blooms fully. This month is great for sowing seeds that will grow into beautiful flowers. Your garden will become a lively place filled with color. By choosing the top 10 flower seeds for May, your garden will be stunning when summer arrives. Let’s dive into the best seeds and techniques for planting in May. This will help you create a garden that’s full of life and color. Key Takeaways May is the ideal month to sow various flower seeds for optimal growth. Choosing the right seeds is crucial for a vibrant summer garden. Planting at the right time leads to a flourishing outdoor space. Effective gardening practices enhance seed germination and growth. Exploring flower varieties can add beauty and diversity. Introduction to Flower Gardening in May May is a time of change in gardening, bringing warmer weather and longer days. This makes it perfect for planting flowers across the United States. Gardeners can enjoy more sunlight and milder temperatures, preparing for a colorful summer. Many flowers do well when planted in May. They grow strong roots, making them healthier and more vibrant. Knowing which flowers to plant in May helps create a lively and beautiful garden. Benefits of Sowing Flower Seeds in May Gardening seasons offer special chances for growth. Sowing flower seeds in May has many benefits. One key advantage is longer blooming periods. Plants can bloom for more months in the summer. May’s warmth also boosts seed germination. Seeds grow better in warmer temperatures, leading to healthier plants. This time, gardeners can choose from a wider variety of flowers that love the heat. Planting in May means a stunning garden by summer. Early planting makes the garden lush and full by peak season. This makes the garden look great and adds life to outdoor spaces. In short, sowing seeds in May brings beauty and practical benefits to gardening. It leads to a more vibrant and successful garden as summer arrives. Top 10 Flower Seeds To Sow In May For A Joyful Summer Garden Bursting With Color Choosing the right flower seeds can make your summer garden vibrant. In May, you can sow many flower seeds for a colorful garden. Here’s a list of the top 10 flower seeds to sow in May, along with their unique features and beauty. This guide is for both new and experienced gardeners to make their outdoor spaces better. Overview of Each Flower Seed Sunflower (Helianthus annuus): Sunflowers are tall and bright yellow, adding joy to any garden. They love full sun and poor soil. Zinnia (Zinnia elegans): Zinnias come in many colors, making your garden diverse. They attract butterflies and bloom all summer. Marigold (Tagetes spp.): Marigolds have a nice scent and keep pests away. They are orange and yellow and love sunny spots. Cosmos (Cosmos bipinnatus): Cosmos have feathery leaves and bright flowers, softening your landscape. They need full sun and attract pollinators. Pansy (Viola × wittrockiana): Pansies are colorful and charming. They like cooler weather and add early color to your garden. Nasturtium (Tropaeolum majus): Nasturtiums are edible and colorful, attracting good insects. They come in red, orange, and yellow. Petunia (Petunia × hybrida): Petunias are versatile and colorful. They do well in containers and hanging baskets, adding beauty at different heights. Snapdragon (Antirrhinum majus): Snapdragons have tall, colorful blooms. They’re great for cutting gardens and can handle cooler nights. Geranium (Pelargonium spp.): Geraniums have bright flowers and round leaves. They’re good for borders and bloom all summer. Verbena (Verbena bonariensis): Verbena has delicate clusters and attracts butterflies. It grows tall, adding layers and texture to your garden. Color and Growth Habit Each flower seed brings a unique color and growth habit to your garden. From sunflowers’ bright yellows to zinnias’ many hues, they add depth and beauty. Planting these top 10 flower seeds in May will make your garden a colorful and joyful place as the summer goes on. Best Flower Seeds to Plant in May Choosing the right seeds for your garden is key to success. The best flower seeds for May should match your local climate and growing conditions. It’s important to know your garden’s environment and what you want to achieve. Factors to Consider When Choosing Seeds Climate: Knowing your region’s climate is crucial. Think about the temperature and rainfall in May. Growing Conditions: Check your soil type, sunlight, and moisture. Seeds that fit your garden’s conditions will do better. Gardening Goals: Decide if you want color, to attract pollinators, or specific bloom times. This helps choose the right seeds. How to Ensure Successful Germination Good germination techniques are vital for a thriving garden. Start by loosening your soil and adding nutrients. Here are tips for the best germination: Soil Preparation: Test your soil’s pH and add organic matter if needed. Sowing Depth: Plant seeds at the right depth for each flower type to help them grow. Watering Methods: Use a fine spray to water gently. This helps prevent soil displacement and supports seedlings. Colorful Garden Seeds for May Sowing May is a great time for gardeners to try new colorful garden seeds. Choosing the right seeds can make your garden look amazing. There are many colors to choose from, each one adding beauty to your garden. Zinnias are a favorite for their bright, daisy-like flowers. Cosmos are loved for their feathery leaves and cheerful blooms. Marigolds add a pop of yellow and orange to any garden. Nigella and Amaranth are also great choices, with their unique looks and vibrant colors. When planning your garden, think about mixing different heights and colors. Pair tall Sunflowers with short Snapdragons for depth. Choose colors that work well together for a beautiful look. Mixing colors can create stunning displays, while contrasting colors add excitement. Flower Color Variety Height Bloom Time Zinnia Red, Yellow, Pink 12-36 inches Summer Cosmos White, Pink, Red 12-36 inches Summer Marigold Orange, Yellow 6-36 inches Summer Nigella Blue, White 12-24 inches Early Summer Amaranth Red, Gold 24-48 inches Late Summer Trying new colorful
A Simple Way to Harden Off Seedlings in 7 Days (Or Less)
Bringing tender plants from indoors to your garden can be scary. Many new gardeners lose their hard work when seedlings die after being moved. This usually happens because they skip a crucial step: gradual acclimatization. Hardening off young plants is more than just keeping them alive. It’s about making them strong. Over seven days, you’ll slowly introduce them to sunlight, wind, and temperature changes. This helps prevent transplant shock, which can stop plants from growing or even kill them. Our method fixes three big issues for beginners: not knowing when to start, worrying about the weather, and feeling overwhelmed. You’ll learn how to balance sun and shade, adjust to sudden cold, and keep things simple. You don’t need any special tools or a greenhouse—just smart planning. Key Takeaways Prevents transplant shock through controlled exposure Strengthens plant structure in less than a week Reduces risk of weather-related damage Works for vegetables, flowers, and herbs Requires only 30-60 minutes daily effort Why Seedling Hardening Is Non-Negotiable Young plants raised indoors feel safe. But, when moved outdoors, they face harsh conditions. This shock can be deadly. This transition period is crucial. It makes the difference between a thriving garden and a graveyard for plants. The Deadly Consequences of Direct Transplanting University studies show 72% of seedlings suffer sunscald damage in 48 hours outside. These white patches harm photosynthesis by 40-60%. Root systems also fail due to temperature changes. Commercial growers face: 83% tomato mortality without hardening 67% pepper flower abortion in sunlight 54% broccoli stem damage in storms “Plants experience vegetative whiplash when moved from stable indoor conditions. It’s like forcing a hibernating bear to run a marathon.” – Dr. Ellen Pritchard, Cornell Horticulture Studies How Acclimatization Boosts Survival Rates The hardening process triggers three key adaptations: Cuticle thickening (leaves become 300% waxier) Stem lignification (stems become woodier in 5 days) Root hair proliferation (roots absorb 4x more water) Gradual exposure helps plants make natural sunscreen. Wind simulation strengthens stems by 22% weekly. USDA data shows hardening boosts transplant success from 30% to 95%. Factor Unhardened Hardened Survival Rate 30% 95% Fruit Yield 1.2 lbs/plant 4.8 lbs/plant Disease Resistance Grade D Grade A Perfect Timing for Starting the Process Knowing exactly when to start hardening off seedlings is key. Starting too early can lead to frost damage. Waiting too long can cause seedlings to struggle. Let’s look at two important factors: frost safety and plant readiness. Reading Your Last Frost Date Correctly The USDA Plant Hardiness Zone Map is a great tool for timing. It shows your average last spring frost date based on your zip code. For example, Zone 6b’s last frost is usually in April, while Zone 8a’s is in March. To avoid frost disasters, follow these steps: Check your zone on the USDA’s official website Add 7–10 days as a buffer Keep an eye on local weather forecasts 3 Visual Cues Your Seedlings Are Ready Your plants will show signs they’re ready for the outdoors. Look for these signs: True leaf development: At least 2–3 pairs of leaves beyond the initial seed leaves Stem lignification: Stems turn slightly woody and can stand upright without support Root ball formation: Roots fill but don’t circle tightly around the container Still unsure? Try the tug test. Gently pull a seedling’s stem. If it resists, roots are ready for hardening. A Simple Way to Harden Off Seedlings in 7 Days (Or Less) Follow this simple seedling hardening schedule to move indoor plants outside safely. Begin with two days of shaded exposure. Place seedlings under a tree or patio for 2-3 hours. This helps prevent leaf scorch on tender plants like tomatoes or basil. Days 3-4 introduce partial sun. Move plants to morning light for 4 hours. Use shade cloth if it’s too hot, over 75°F. Rotate containers for even light. This step strengthens stems without stressing young plants. Days 5-6 provide full outdoor conditions for 6-8 hours. Water well before each session to fight wind stress. Check soil moisture midday. Burpee’s Organic Potting Mix holds water better than standard soils. Day 7 tests overnight readiness. Leave hardy plants like kale or broccoli outside if it’s warm. Cover delicate herbs with frost cloth for cold protection. This step prepares plants for their new beds. Adjust timelines for cold-sensitive varieties. Eggplants might need 10 days, while marigolds adapt in 5. Always check weather apps like AccuWeather for frost alerts before overnight trials. Transplant within 48 hours after hardening. Dig holes slightly larger than root balls. Mix in Espoma Bio-tone Starter Fertilizer to reduce shock. Plants conditioned this way have an 85% survival rate, says University of Minnesota Extension research. FAQ Why is hardening off seedlings necessary? Hardening off seedlings helps them get used to outdoor life. It stops shock from sudden changes. This makes plants stronger and more likely to survive, with a success rate of 30% to 95%. Can I skip hardening off if I’m short on time? Skipping hardening off can harm your plants a lot. It can cause sun damage, leaf burn, or even kill them. Even a quick 4-day hardening plan is better than not hardening at all. How do I determine my last frost date accurately? Look at the USDA Plant Hardiness Zone Map and local resources. For example, Zone 5b’s last frost is usually in April. Use weather history from sites like Weather Underground for exact dates. What are the visual signs that seedlings are ready for hardening? Seedlings should have 3–4 true leaves and strong stems. They should also have roots showing at the drainage holes. Some plants, like tomatoes, need sturdier stems. Broccoli needs a well-developed root ball. What if thunderstorms or frost occur during the 7-day hardening period? Bring seedlings inside or cover them if bad weather comes. Wait until it’s safe again, then start over. For frost, use blankets like Agribon-19 to keep them warm. Can the 7-day method work for tropical plants like peppers or eggplants? Yes, but give them more sun time. Peppers might need shade in the middle of the day. Watch for signs like leaf curling
Breaking It Down: 12 Best Types of Organic Mulch
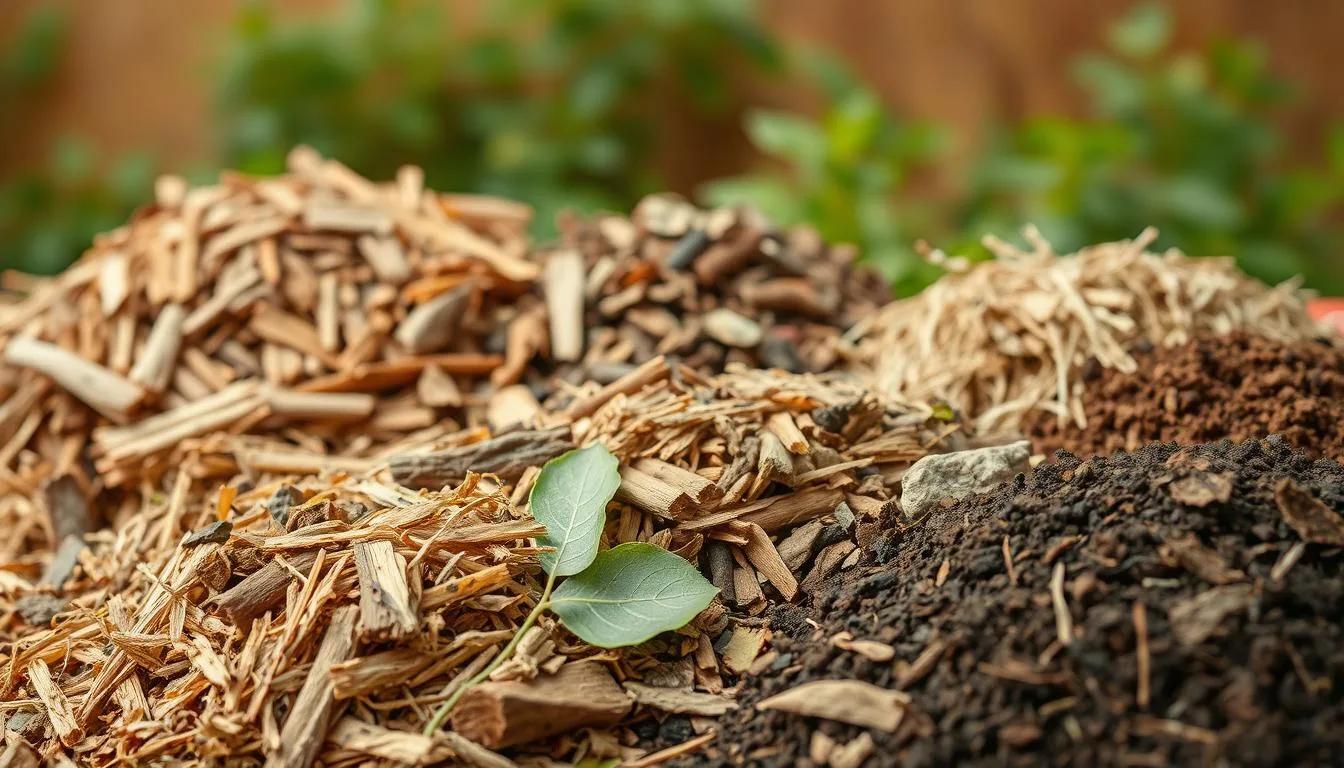
Breaking It Down: 12 Best Types of Organic Mulch In the world of gardening, organic mulch is key. This article explores the 12 best types of organic mulch for a healthy garden. Organic mulch does more than look good; it protects and feeds the soil. It helps keep the garden balanced and fights off environmental problems. By looking at different mulches, we see their many benefits. They are vital for keeping the soil alive in organic gardens. Key Takeaways Organic mulch supports soil health and moisture retention. It helps in regulating soil temperature and protecting plant roots. Different types of mulch serve unique purposes in the garden. Using organic mulch can significantly reduce weed growth. Incorporating mulch into sustainable gardening practices enhances ecological balance. Applying the right mulch at the right time is crucial for effectiveness. Understanding Organic Mulch and Its Importance Organic mulch is key in gardening and landscaping. It makes gardens look better and work better. It helps plants grow strong and healthy. What is Organic Mulch? Organic mulch is made from things like leaves, wood chips, and grass clippings. It keeps the soil moist, stops weeds, and controls temperature. As it breaks down, it makes the soil better for plants. Benefits of Mulch for Your Garden Mulch does more than just look good. It keeps the soil wet, so you don’t have to water as much. It also keeps the soil warm, which helps plants grow. Plus, it adds nutrients to the soil as it breaks down. How Organic Mulch Contributes to Soil Health Organic mulch is great for the soil. It adds nutrients and improves the soil’s structure. This leads to better water retention and more life in the soil. Regular use of mulch keeps the soil healthy and supports many plants. Breaking It Down: 12 Best Types of Organic Mulch Choosing the right mulch for your garden is key to plant health and looks. Each organic mulch has its own benefits, fitting different gardening needs. Here, we explore twelve types, covering their sources, uses, and garden benefits. Wood Chips Wood chips are a top choice for mulching. They last long, keeping weeds down and soil moist. They’re perfect for landscape beds and tree areas, adding a natural charm. Straw Straw is a favorite in community gardens for its light weight and cost. It holds moisture well and is great for seedlings. As it breaks down, it enriches the soil. Grass Clippings Using grass clippings as mulch is a smart way to recycle lawn waste. They’re rich in nitrogen and decompose fast, feeding the soil. They’re excellent for vegetable gardens. Leaf Mold Leaf mold is made from decomposed leaves and is great for soil. It improves soil structure and water retention. Though it takes time to make, it’s worth it for the soil benefits. Cocoa Shell Mulch Cocoa shell mulch is fragrant and keeps weeds down while retaining moisture. It’s nutrient-rich but should be avoided around pets due to theobromine toxicity. Pine Bark Pine bark mulch is decorative and functional. It drains well and can lower soil acidity. It’s great for flower beds and around perennials. Shredded Paper Shredded paper is an eco-friendly mulch option. It’s light, absorbs moisture, and suppresses weeds. Use it in layers to avoid matting. Compost Compost is a two-in-one solution: it enriches soil and acts as mulch. The composting process creates nutrient-rich material that supports plant growth. It boosts microbial activity, making the soil healthier. Hay Hay is similar to straw but may have seeds. It’s good for vegetable gardens, retaining moisture and feeding the soil. Make sure to use seed-free hay to avoid unwanted growth. Newspaper Newspaper can be a useful mulch when layered correctly. It suppresses weeds and breaks down slowly, adding organic material to the soil. Wetting the sheets helps prevent them from blowing away. Cardboard Cardboard, from packaging, is a cost-effective mulch option. It suppresses weeds and enriches the soil as it decomposes. Remove glossy surfaces to ensure it breaks down well. Type of Mulch Key Benefits Ideal Uses Wood Chips Durability, weed suppression Landscape beds, tree bases Straw Moisture retention, lightweight Seedlings, vegetable gardens Grass Clippings Rich in nitrogen Vegetable gardens Leaf Mold Improves soil structure All garden types Cocoa Shell Mulch Fragrant, nutrients-rich Flower beds Pine Bark Excellent drainage Flower beds, perennials Shredded Paper Absorbent, recycled material General garden use Compost Nutrient-rich, promotes microbial activity All garden types Hay Moisture retention, soil feeding Vegetable gardens Newspaper Weed suppression Under shrubs, flower beds Cardboard Cost-effective, organic enrichment Weed control, garden beds Mulching Tips for Effective Use Using organic mulch in your garden can really help. It improves soil health, keeps moisture in, and controls weeds. To get the most out of it, follow these tips on how to apply, when to do it, and how to layer it. How to Apply Organic Mulch Start by removing weeds and debris around your plants. Spread a 2 to 4-inch layer of mulch around the base, but not touching the stems. Different plants need different depths, so adjust as needed. Best Timing for Mulching When you mulch matters a lot. Mulch in early spring to keep soil moist in warm weather. Mulching in late fall protects plants from cold damage. Stick to these times for the best results. Layering Techniques for Optimal Benefits Layering mulch can make it even better. Use coarse materials at the bottom and finer ones on top. This helps keep moisture in and adds nutrients. Try different layers to see what works best for your garden. Integrating Organic Mulch into Sustainable Gardening Practices Adding organic mulch to your garden does more than just help your plants. It fits well with many sustainable gardening practices. When you mix mulch with other organic gardening methods, your garden can flourish. Techniques like composting, crop rotation, and natural pest control all work better with mulch. Combining Mulch with Other Organic Gardening Techniques Organic gardening is all about a complete approach. Using organic mulch can make composting more effective. As mulch breaks down, it adds nutrients to the soil, helping plants grow. Mulch

7 Edible Cover Crops That Provide Food While Building Your Soil
7 Edible Cover Crops That Provide Food While Building Your Soil Edible cover crops are changing gardens and farms in the U.S. They do two things: they make the soil better and give us food. The 7 edible cover crops that provide food while building your soil are a smart choice for those wanting to grow more and protect the planet. This guide shows how edible cover crops help the environment and give us food. You’ll learn about crops that stop soil erosion, add nitrogen, and give us fresh food all at once. They’re great for both home gardens and big farms, fitting into today’s green farming ways. Key Takeaways Edible cover crops improve soil structure while providing food. Seven specific varieties are proven to enhance garden productivity. They reduce the need for synthetic fertilizers and pesticides. These plants help retain moisture and suppress weeds naturally. Growers gain both nutrition and environmental benefits year-round. Exploring the Benefits of Edible Cover Crops Edible cover crops do more than just grow—they turn gardens and farms into living ecosystems. By using food-producing cover crops, farmers can cut down on chemicals and make farming more sustainable. These plants help make the soil better for future crops. Soil-Building Advantages These crops help the soil in many ways: Roots stop soil erosion and make it airier, breaking up hard layers. As they decay, they add organic matter, which boosts soil life. They keep moisture in, reducing the need for water during dry times. Nutrient-Rich Impact on Food Production Food-producing cover crops also help plants grow. Legumes like clover add nitrogen to the soil naturally. This means less need for chemical fertilizers. Fields with these crops see: Higher yields in the next crops. Soil gets richer over time. “Cover crops increase soil organic carbon, a key factor in sustainable agriculture,” states a USDA Natural Resources Conservation Service report. Clover and annual ryegrass are great choices. Clover fixes nitrogen, and ryegrass keeps weeds away. These plants start a cycle where soil gets better and farmers get more crops. Techniques for Planting and Maintaining Soil-Enriching Cover Crops To make sure cover crops grow well, start by preparing the soil. Make sure the beds are tilled and free of debris. Check the soil’s pH level to see if it matches what the crops need. Clover likes slightly acidic soil, while rye does well in neutral ranges. Seed at recommended rates. Broadcast legumes like vetch at 20-30 pounds per acre or use drills for even distribution. Water immediately after planting. Keep soil moist until germination, then reduce frequency as plants establish. Maintain with regular weed checks. Hand-pull invaders early to avoid competition for nutrients. Timing is key. Plant cool-season crops like oats in early fall and warm-weather legumes in spring. Use this guide to align with regional growing zones: Crop Planting Window Key Maintenance Winter Rye August-October Mow before seed set Hairy Vetch September-November Rotate with non-legume crops Annual Ryegrass March-May Water weekly during dry spells Regular checks prevent pests. Look for aphids or fungal spots on leaves weekly. Use neem oil sprays to keep pests away. When the crops are at their peak, cut them down and till them under. This releases nutrients back into the soil. With the right care, these plants become a powerful tool for building soil. Growing 7 Edible Cover Crops That Provide Food While Building Your Soil Turn your garden into a place that feeds you and the earth. Edible cover crops are a smart choice for gardeners. They help your garden grow strong and healthy. Identifying the Best Food-Producing Cover Crops These seven crops are great for both food and soil: Peas: They fix nitrogen and their pods are tasty. Red Clover: It attracts bees and its leaves are full of protein. Winter Rye: It breaks up hard soil and its shoots are good in stir-fries. Sorghum-Sudangrass: It grows tall and keeps weeds away. Mustard: It keeps pests away and its leaves are spicy. Buckwheat: It attracts good bugs and helps clay soils. Fava Beans: They add nitrogen and their shoots are delicious. Step-by-Step How-To Guide for Your Garden Soil Test: Use kits from brands like Luster Leaf to check your soil’s pH. Seed Mixtures: Mix radishes with oats for a layered garden. Plant Timing: Plant peas in spring and mustard in fall for best results. Maintenance: Cut crops before they flower to stop seeds from spreading. Then, till them into the soil. Harvest Strategy: Pick leaves often to make the plants grow back and keep the soil covered. Use Seeds Now guides for planting tips. See how clover cuts down on fertilizer and makes soil better over time. Maximizing Sustainable Farming with Cover Crops for Food and Soil Sustainable farming cover crops are key in modern agriculture. They mix caring for the environment with growing food. Farms in the U.S. see better soil, lower costs, and more crops by using these methods. By using less synthetic fertilizers, farmers save money and make their land healthier for longer. A 2023 USDA study looked at 150 Midwest farms using cover crops. They found a 35% drop in nitrogen runoff and a 20% boost in soil organic matter over five years. Midwest Harvest Farms saw their corn yields go up 12% and cut down on chemicals. “Cover crops rebuild soil like nothing else. They’re my farm’s foundation for the next generation.” Ecological benefits: Prevent erosion, sequester carbon, and support pollinators. Economic wins: Lower input costs and stable harvests despite climate shifts. Long-term gains: Healthy soils resist pests and diseases naturally. These methods match USDA conservation programs, offering grants to farmers. As climate challenges increase, using cover crops helps make food systems strong for the future. Optimizing Gardens with Edible and Soil Building Cover Crops Boost your garden’s productivity by using nutrient-rich cover crops. These plants make your soil better and give you food, too. This way, you get healthy soil and lots of food. Integrating Food-Producing Varieties Grow edible cover crops with your main crops to save space. Here are some tips: Crop Type Edible Use Soil Benefit Red Clover Leaves for teas Fixes nitrogen Buckwheat Seeds for flour Loosens compacted

How to Grow Fava Beans as a Cover Crop and Get Free Fertilizer
How to Grow Fava Beans as a Cover Crop and Get Free Fertilizer Ever thought a simple plant could make your garden rich in nutrients for free? Growing fava beans as a cover crop does just that. It boosts soil health and gives you free fertilizer through nitrogen fixation. This method is a green solution to farming problems, making soil better, stopping erosion, and increasing plant variety. Let’s dive into how to grow fava beans as a cover crop. You’ll get free fertilizer and make your garden better. Key Takeaways Fava beans are an excellent choice for sustainable agriculture. Growing fava beans enriches the soil with nitrogen. This cover crop reduces erosion and enhances biodiversity. Fava beans can be easily integrated into your planting schedule. Transform fava beans into green manure for further soil benefits. Introduction to Fava Beans as a Cover Crop Fava beans are a great choice for a cover crop. They are cold-tolerant and can be planted in fall or early spring. This helps protect the soil when it’s most vulnerable. Their extensive root system is a big plus. It prevents soil erosion and boosts microbial activity. This makes the soil healthier overall. Growing fava beans is easy, making them perfect for all gardeners. They work well in different soils. Using fava beans helps make the soil richer and supports sustainable gardening. By adding a fava bean cover crop, gardeners create a strong ecosystem. This benefits both plants and the soil. Understanding the Benefits of Fava Beans as Cover Crop Fava beans are great for farmers and gardeners. They make the soil better by fixing nitrogen. This turns air nitrogen into something plants can use, making the soil richer and helping crops grow well. Fava beans also help fight weeds. Their thick leaves block sunlight, stopping weeds from growing. This means you don’t need to use harmful chemicals to control weeds. They also make the soil better by improving its structure. Fava beans’ deep roots help the soil drain better and hold more water. This is very helpful in dry areas where water is scarce. Studies show that using fava beans in farming can make future crops grow better. This helps farmers grow food in a way that’s good for the planet. It supports healthy farming and helps ensure we have enough food. Benefit Description Nitrogen Fixation Transforms atmospheric nitrogen into a usable form, enhancing soil fertility. Weed Suppression Dense foliage limits weed growth, reducing reliance on herbicides. Soil Structure Improvement Deep roots aerate the soil, improving drainage and water retention. Yield Improvement Leads to better crop yields in subsequent planting seasons. How to Grow Fava Beans as a Cover Crop and Get Free Fertilizer Growing fava beans as a cover crop is very beneficial. It lets you get organic fertilizer for your garden. This guide will show you how to plant fava beans to get the best results. Step-by-Step Guide to Planting Fava Beans Start by tilling your soil to a depth of 12-15 inches. Choose a spot with well-draining soil that’s rich in organic matter. Pick high-quality fava bean seeds from a trusted supplier. Plant the seeds 6 inches apart and bury them 1-2 inches deep. The best times to plant are fall or early spring when the soil is between 50°F to 70°F. Keep an eye out for pests and rotate your crops to get the most out of it. Optimal Growing Conditions for Fava Beans Fava beans need the right amount of moisture and temperature. Make sure they get about 1 inch of water each week. They do best in slightly alkaline soil, with a pH of 6.0 to 7.5. When your fava beans are ready, they’ll make your soil richer. This makes them a great choice for eco-friendly gardening. Growing Fava Beans for Soil Enrichment Fava beans are great for the soil, especially as a cover crop. They work with nitrogen-fixing bacteria to make nitrogen from the air usable. This makes the soil better for fava beans and other crops. How Fava Beans Improve Soil Health Fava beans make the soil better in many ways. Their roots help the soil breathe and become more open. This makes it easier for other plants to grow. The roots also help break up hard soil. When fava beans die, their remains add nutrients to the soil. This helps create a healthy place for plants to grow. Nitrogen Fixation Process The nitrogen-fixing process is key for healthy soil. Fava beans have special roots that hold bacteria. These bacteria turn nitrogen from the air into a form plants can use. This is important because nitrogen is often missing from the soil. Using fava beans instead of synthetic fertilizers is better for the environment. It also helps future crops grow well, making fava beans a great choice for farming. Creating Organic Fertilizer from Fava Beans Fava beans are great for both eating and making organic fertilizer. By putting the plant material back into the soil after harvest, farmers can make rich, organic fertilizer. This method not only recycles nutrients but also makes the soil healthier. Here are some ways to make free fertilizer from fava beans: Chop and Drop: Just cut the fava bean plants at ground level and leave them on the soil. This lets the organic matter break down naturally, adding nitrogen to the soil. Composting: Gather the fava bean leftovers and mix them with other organic stuff like kitchen scraps or yard waste. This compost is a great fertilizer for your garden. Green Manure: Grow fava beans just to use as green manure. Before they seed, mix them into the soil. As they break down, they give nutrients back to the earth, helping plants grow well. Using fava beans in these ways is very beneficial. When farmers make organic fertilizer from fava beans, they help the environment and make their soil better. This method also cuts down on the need for chemical fertilizers, making farming healthier. Cover Cropping with Fava Beans: Best Practices Using fava beans for cover cropping can

How to Best Fertilize Tomatoes for the Ultimate Bumper Crop
How to Best Fertilize Tomatoes for the Ultimate Bumper Crop Getting tomatoes to grow well depends a lot on how you fertilize them. Tomato plants need certain nutrients to grow strong. Knowing what they need is key to getting a healthy crop. This article will give you the best tips on fertilizing tomatoes. You’ll learn how to feed your plants right. This will help you get the most tomatoes possible from your garden. Key Takeaways Understanding nutrient requirements is crucial for tomato growth. Effective fertilization techniques can significantly boost your tomato yield. Balancing NPK is essential for the nutritional needs of tomato plants. Choosing the right fertilizer—organic or synthetic—can impact overall plant health. Proper timing and application methods enhance the effectiveness of fertilization. Understanding Tomato Plant Nutrition Tomato plants need the right nutrients to grow well. Certain nutrients are key for tomatoes to thrive and produce great fruits. Using good tomato plant nutrition tips can really help your plants grow better. Essential Nutrients for Tomato Growth Tomato plants need different nutrients to grow well. The most important ones are: Nitrogen: It helps leaves grow and makes plants strong. Phosphorus: It helps roots grow and supports flowers, so plants can make more fruit. Potassium: It helps plants take in water and makes fruits taste better and be firmer. The Role of NPK in Fertilizing Tomatoes The NPK ratio on fertilizer shows how much nitrogen, phosphorus, and potassium it has. Knowing this ratio helps you give the right nutrients at the right time. When plants are young, more nitrogen is good. But as they grow and make flowers and fruit, phosphorus and potassium are more important. Changing the NPK ratio based on your plant’s needs is key. This ensures your tomatoes get the nutrients they need to grow well. How to Best Fertilize Tomatoes for the Ultimate Bumper Crop To grow tomatoes well, you need to know how to fertilize them right. Start by testing your soil to see what nutrients it lacks and its pH level. This helps you pick the best fertilizer for your soil, making sure it’s ready for your tomatoes to grow strong. Before you plant, add organic matter like compost to the soil. This makes the soil better for your plants. Use a balanced fertilizer with the right NPK ratio to give your tomatoes the nutrients they need. Put this fertilizer in the soil when you plant for the best start. As your tomatoes grow, they need more food. Use water-soluble fertilizers every few weeks to help them grow fast. But remember to follow the instructions to avoid harming your plants. Watching how your plants do will tell you if they need more food. Knowing when to fertilize is key. Fertilizing early helps your tomatoes grow strong. Later, when they’re making fruit, more potassium helps make the fruit better and more. In short, fertilizing tomatoes well needs a plan. From testing the soil to feeding them right, follow these steps for healthy tomatoes and a big harvest. Best Fertilizers for Tomatoes Choosing the right fertilizer is key to your tomato plants’ health and yield. Knowing the difference between organic and synthetic fertilizers is crucial. Each type has its own benefits and drawbacks, fitting different gardening styles and values. Organic vs. Synthetic Fertilizers Organic fertilizers come from natural sources, improving soil health over time. They release nutrients slowly, giving plants a steady supply. This boosts the soil’s ecosystem of beneficial microorganisms. Synthetic fertilizers, however, provide quick results by making nutrients available right away. But, they can harm the environment through runoff and soil damage. Top Recommended Brands Many brands stand out in tomato fertilization. Here are some top picks that gardeners often suggest: Brand Type Benefits Miracle-Gro Synthetic Rapid nutrient delivery; broadly available. Espoma Organic Improves soil health; promotes beneficial soil microorganisms. Dr. Earth Organic Rich in nutrients and beneficial microbes; environmentally friendly. Organic Tomato Fertilizing Techniques Organic tomato fertilizing techniques are key to growing healthy tomatoes. Using compost and manure, along with homemade fertilizers, gives plants the nutrients they need. This approach also keeps the soil healthy. Compost and Manure Benefits Compost makes the soil better and slowly releases nutrients. It’s great for tomatoes. It adds organic matter and helps good microbes grow. Manure, like chicken or cow, is safe for tomatoes too. Just use it as directed to keep plants healthy. Homemade Fertilizers for Tomatoes Making your own fertilizers is fun and good for your tomatoes. You can mix banana peels, which are full of potassium, with Epsom salt for magnesium. This mix makes a fertilizer that’s full of nutrients and helps tomatoes grow well. Fertilizer Type Main Nutrients Benefits Compost N, P, K (varies) Improves soil structure, enhances microbial life Chicken Manure N, P, K High nutrient content, fast-acting Cow Manure N, P, K (lower concentrations) Safe for beginner gardeners, gradual nutrient release Banana Peels K, Mg Promotes flowering and fruit development Epsom Salt Mg, S Enhances nutrient absorption, prevents blossom end rot Boosting Tomato Growth with Fertilizer Timing and method of fertilizer application are crucial for tomato growth. Knowing when and how to apply nutrients can lead to healthier plants and more tomatoes. Timing Your Fertilization for Maximum Effect The right time for fertilizer is key to better tomato health and more tomatoes. For the best results, fertilize at these important times: At Planting: Mix a balanced fertilizer into the soil when planting seedlings. This helps with strong roots and early growth. During Flowering: Add more fertilizer when plants start flowering. This supports fruit growth. During Fruiting: Keep fertilizing during fruiting to give tomatoes the nutrients they need for a big harvest. Understanding Fertilizer Application Methods There are different ways to apply fertilizer, each with its own benefits for tomato growth. Here are some effective methods: Broadcasting: Spread granulated fertilizer over the soil before watering. This lets nutrients reach the roots. Side-Dressing: Put fertilizer alongside growing plants. This gives nutrients directly to the roots at key times. Foliar Feeding: Spray a weak fertilizer solution on leaves for quick absorption. It’s great during

Cover Cropping the Easy Way: How to Grow Austrian Winter Peas to Improve Your Soil
Cover Cropping the Easy Way: How to Grow Austrian Winter Peas to Improve Your Soil Starting with Austrian winter peas is a great way to improve your soil. These hardy legumes add nitrogen and prevent erosion. They are perfect for gardens and farms. This guide will show you how to plant and care for these cover crops. Key Takeaways Austrian winter peas enhance soil structure and fertility through natural nitrogen fixation. Planting requires minimal effort, fitting into any seasonal farming or gardening plan. Reduces reliance on synthetic fertilizers, lowering costs and environmental impact. Prevents soil erosion and compaction, improving long-term productivity. Easy maintenance aligns with sustainable practices for home and commercial growers. Benefits of Cover Cropping with Austrian Winter Peas Austrian winter peas cover cropping boosts soil and farm productivity. It offers ecological and practical benefits for farming. Enhanced Soil Structure Root systems break up compacted soil, improving aeration and water infiltration. Decomposing biomass adds organic matter, boosting soil stability and tilth. Nitrogen Fixation Advantages These legumes form symbiotic relationships with soil bacteria. They naturally enrich soil nitrogen levels. This reduces synthetic fertilizer dependency by up to 30% in subsequent crops. Environmental and Economic Benefits Category Impact Environmental Reduces erosion by 40% and lowers nitrate leaching risks Economic Cuts fertilizer costs by $150-$250/acre annually These peas also suppress weed growth naturally, minimizing herbicide use. Their deep root systems prevent soil compaction better than many traditional cover crops. Farmers in the Midwest report 15-20% yield increases in follow-up corn crops after using this cover crop system. Sustainable soil management through Austrian winter peas cover cropping aligns with USDA conservation goals while maintaining profitability. Cover Crop Techniques: How to Plant Austrian Winter Peas Learning how to plant Austrian winter peas is key to improve your soil with austrian winter peas. First, get your seeds ready. Then, pick the best way to plant them for the best growth. Seed Preparation and Sowing Methods Start with top-quality seeds. Soaking them overnight can help them grow faster. Use a drill seeder or spread seeds out evenly. Plant at a rate of 25–40 pounds per acre. Adding companion crops like oats or rye can help cover more soil. Optimal Planting Timeframes When you plant is important. In cooler areas, plant in late summer or early fall. For warmer places, plant 6–8 weeks before the first frost. Choose planting times based on your USDA hardiness zone. Zones 4–8 are best. Don’t plant in spring to avoid too many plants. Establishing a Successful Cover Crop Keep the soil moist until the roots grow strong. Cut the crop before it flowers to stop seeds from spreading. Mix it into the soil 2–3 weeks before spring planting to release nutrients. Watch out for pests like aphids and deal with them quickly. Cover Cropping the Easy Way: How to Grow Austrian Winter Peas to Improve Your So Learning how to plant Austrian winter peas is key to getting their cover crop benefits. This guide will help you improve your soil health easily. Step-by-Step Planting Guide Start by lightly tilling the soil to loosen it. Remove any debris but keep the existing plants to prevent erosion. Seed at 60–70 lbs per acre. Use a drill or broadcast spreader. Lightly rake to ensure good contact between seeds and soil. Water the soil right after planting. Keep it moist until you see sprouts in 7–10 days. Maintenance and Care Tips Mow the pea plants when they’re 6–8 inches tall. This helps their roots grow stronger. Watch out for aphids. Treat them early with neem oil if you see them. Stop the cover crop before it flowers too much. This helps keep more nitrogen in the soil. Common Pitfalls and How to Avoid Them Avoid these mistakes to keep the cover crop benefits: Overplanting: Stick to the recommended seeding rates. This prevents the plants from competing for roots. Delayed termination: Don’t let the peas flower too much. It reduces how well they fix nitrogen. Ignoring soil tests: Make sure the soil pH is right for peas. They do best at 6.0–7.5. “Timing is key. Planting after summer crops maximizes soil protection and nutrient cycling.” – USDA Sustainable Agriculture Research Program Soil Health and Nutrient Management with Austrian Winter Peas Austrian winter peas make soil better through natural ways. They help manage nutrients in a sustainable way. Their roots loosen the soil, making it easier for air and water to get in. Easy cover cropping techniques with these peas cut down on synthetic fertilizers. They add nitrogen to the soil naturally. This makes the soil better for future crops to grow well. Nitrogen fixation that boosts soil fertility Enhanced organic matter through biomass decomposition Reduced erosion by stabilizing topsoil Table 1 compares soil conditions before and after using Austrian winter peas: Aspect Before Cover Cropping After Cover Cropping Nitrogen levels Low Enriched via natural fixation Soil structure Compacted Loosened and aerated Organic matter Scarce Increased by biomass decay Soils managed with easy cover cropping techniques keep up to 30% more nutrients. Farmers using these methods see better crop yields and soil health. Adding Austrian winter peas to farming is good for the environment and doesn’t need complicated products. Tips on Cover Crop Management for Effective Soil Improvement Learning the winter pea planting guide helps Austrian winter peas grow well. Good management makes soil healthier and crops more bountiful. Here are some tips to tackle common issues: Weed and Pest Control Strategies Stop weeds from competing early on. Try these tactics: Mulch between rows to keep weeds down Hand-pull weeds before they spread seeds Attract beneficial insects like ladybugs to fight aphids Irrigation and Water Management Water wisely with this guide: Soil Type Water Frequency Depth Clay Every 10-14 days 6-8 inches Sandy Every 5-7 days 4-6 inches Loamy Every 7-10 days 5-7 inches Integrating Organic Amendments Add compost or well-rotted manure at a 2:1 ratio with soil. Follow this schedule: Put amendments in 2 weeks before planting Gently mix into topsoil Check nutrient levels with soil tests “Healthy soil feeds future harvests,” says USDA agronomist Dr. Lena Carter. “Prioritize

Are You Growing These Powerhouse Vegetables?
Are You Growing These Powerhouse Vegetables? Exploring vegetable gardening, you might hear about powerhouse vegetables often. But what are they, and why grow them? These veggies are packed with nutrients, offering 10% or more of your daily needs per 100 kcal. They include essential nutrients like potassium, calcium, and vitamins. By growing these, you boost your diet and health. For example, watercress is the most nutrient-rich, scoring 100 in a CDC study. Other top veggies like Chinese cabbage and spinach also offer great health benefits. Whether you garden outdoors or indoors, choosing to grow these veggies can improve your health and cooking. So, are you growing these powerhouse vegetables? Key Takeaways Powerhouse vegetables are defined by their high nutrient density and health benefits. Watercress is the most nutrient-dense vegetable, scoring 100% in a CDC study. Chinese cabbage varieties score impressively at 91.99% for nutrition. Growing conditions for these vegetables favor cool seasons, typically early spring or fall. Many powerhouse vegetables can also be grown indoors as nutrient-rich microgreens. Incorporating these vegetables into your diet can help prevent chronic illnesses and boost energy. Understanding Powerhouse Vegetables Powerhouse vegetables are key to a healthy diet. They are packed with nutrients that boost overall health. The Centers for Disease Control and Prevention highlights these veggies for their high nutrient density. Knowing about powerhouse vegetables helps us choose better foods for long-term health. Definition and Importance Powerhouse vegetables give 10% or more of 17 essential nutrients per serving. They are great for those watching their weight but still need plenty of nutrients. Watercress and Swiss chard are top examples, known for their nutrient-rich profiles. Nutrient Density Explained Nutrient density is how much good stuff a food has compared to its calories. A 2014 CDC study found 41 veggies that are powerhouse foods. These foods let us enjoy different tastes while getting lots of nutrients, like in dandelion greens and microgreens. The Role of Powerhouse Vegetables in Disease Prevention Eating powerhouse vegetables daily helps prevent diseases. They are full of antioxidants that fight body stress. Tomatoes, for example, have lycopene, which is good for the heart and skin. Eating nutrient-dense foods helps prevent chronic diseases like cancer and diabetes, making growing veggies important for health. Top Cold-Tolerant Powerhouse Vegetables Winter gardening lets you grow nutritious food even in cold places. These vegetables not only handle frost but also grow well, offering fresh greens when others can’t. Watercress, kale, and spinach are great for gardeners wanting to get the most from their winter garden. Watercress: The Nutrient King Watercress is known as the top cold-tolerant vegetable. It has a nutrient score of 100, making it very nutritious. It loves moist soil, which is perfect for winter gardens. Watercress is not only tough but also tasty. It’s great in salads and soups, adding flavor and nutrition. Discovering the Benefits of Kale Kale is more than just nutritious. Varieties like ‘Lacinato’ and ‘Winterbor’ can handle cold well. They’re full of vitamins A, C, and K, which are good for your eyes and help fight inflammation. Adding kale to your garden means you can enjoy its health benefits all winter long. Why Spinach Should Be a Garden Staple Spinach is getting more popular because it’s versatile and nutritious. Varieties like ‘Bloomsdale Long Standing’ and ‘Tyee’ can handle cold. Spinach is full of lutein and zeaxanthin, which are good for your eyes. Its ability to adapt and its nutritional value make it a must-have for gardeners. It’s perfect for both beginners and experienced gardeners looking to harvest into winter. Are You Growing These Powerhouse Vegetables? Adding powerhouse vegetables to your vegetable gardening can boost your diet. Vegetables like zucchini, beans, and tomatoes are full of nutrients. Zucchini, for example, is rich in vitamins C and A, good for your heart and eyes. Beans are packed with protein and fiber, helping your heart and lowering cholesterol. These veggies are perfect for growing at home. Don’t forget to include kiwi fruits and sweet peppers in your garden. Kiwi fruits have more vitamin C than oranges, boosting your breathing. Sweet peppers are full of antioxidants and vitamins, adding flavor to your meals. Broccoli and raspberries are also great for your garden. Broccoli fights cancer and is full of calcium and folate. Raspberries are loaded with antioxidants, keeping your immune system strong and your eyes healthy. When picking new veggies, think about their nutritional value. Watercress is at the top, followed by Chinese cabbage and chard. These can grow well in cooler weather. Adding kale or spinach to your meals can make them much healthier. Choose homegrown produce for better health and to help the planet. Start growing veggies that make you feel good today. Best Practices for Growing Powerhouse Vegetables To grow powerhouse vegetables, follow key practices. These include preparing the soil well and using the right watering methods. Knowing these steps can make your garden flourish. Soil Preparation for Nutrient-Rich Growth Good soil is key for healthy plants. Adding nutrient-rich soil amendments helps a lot. Here’s how to prepare your soil: Choose a soil mix that drains well and has organic matter. Check your soil’s pH to see if it’s right for your veggies. Most like a pH of 6.0 to 7.0. Add compost and manure to make the soil more fertile. Use cover crops in off-seasons to improve the soil. Watering Techniques and Temperature Considerations Watering is very important for growing veggies. Most veggies like consistent moisture. Here’s how to water them right: Water deeply but not too often to help roots grow deep. Use drip irrigation to save water and prevent soil erosion. Adjust how often you water based on the weather, especially in cooler places. Use mulch to keep moisture in and soil temperature stable. Young plants need protection from cold. Use row covers or cloches to keep them warm. This helps them grow well and ensures a good harvest. Vegetable Best Planting Time Watering Needs Kale Spring and Fall Moderate, keeps soil consistently moist Cucumbers After last frost High, especially during flowering Carrots 3 weeks before last frost Moderate, avoid overwatering Spinach Early Spring and Fall Moderate,
How to Soak Seeds and Speed Up Germination Time
How to Soak Seeds and Speed Up Germination Time Soaking seeds is key for gardeners wanting better germination rates and healthier plants. It helps seeds grow faster and stronger. By soaking seeds, you can cut germination time by up to 50% for some types. It also gets seeds ready for the best growing conditions. This article will show you how to soak seeds for faster germination. You’ll learn the best methods and techniques for soaking seeds. Key Takeaways Soaking seeds can cut germination time by up to 50% for some seed varieties. Experts recommend a soaking duration of 12 to 36 hours for most seeds. An overnight soak of 8-12 hours is often sufficient for many seeds to break dormancy. Certain seeds, like peas, benefit from soaking for 8-10 hours to enhance germination. Not all seed types require soaking; specific methods are essential for different varieties. Using hot tap water or a 3% hydrogen peroxide solution can be effective soaking techniques. Scarification combined with soaking can significantly improve germination success rates. Understanding the Benefits of Soaking Seeds Soaking seeds is a technique many gardeners use to boost their success. It helps seeds germinate better, thanks to the softening of the seed coat. This makes seeds use their energy for growth, not just to break through their shells. Why Soaking Improves Germination Rates Soaking seeds overnight can make them swell, ready for planting. Seeds like beans, peas, corn, and sunflowers benefit a lot. Research shows that soaking and scarifying seeds can lead to higher germination rates. Soaking seeds in warm water for 8 to 12 hours can greatly improve germination. For example, corn seeds soaked in humic acids for 10 hours germinated at a 98% rate. Common Misconceptions About Seed Soaking Some myths about seed soaking still exist. People think all seeds need soaking, but not all do. Hybrids and soft-shelled seeds might not need it. It’s also believed that longer soaking times are always better. But soaking for more than 24 hours can harm seeds. Knowing these facts helps gardeners use soaking to their advantage. How to Soak Seeds and Speed Up Germination Time Soaking seeds before planting can really help them grow faster. You’ll need a few simple things and some knowledge about seeds. You’ll need clean glass bowls, lukewarm water, and paper towels. Knowing how long to soak seeds can also help a lot. Essential Supplies for Seed Soaking To soak seeds well, you’ll need a few things: Clean glass bowls for soaking seeds Lukewarm water that’s not too hot, around 95°F Paper towels for wrapping seeds if needed Different Seed Types That Benefit from Soaking Not all seeds need soaking, but some really do. Larger seeds usually soak up water well, like: Peas: Soak for 8-12 hours to speed up germination. Beets: Soak for 8-12 hours for better germination rates. Pumpkin and Corn: Soak for 6-24 hours to sprout faster. Cucumber: Soak wrapped in a towel overnight for better results. Thin-skinned beans: Soak for 2-4 hours. Thick-skinned beans need 8-10 hours. Sunflower seeds: Soak for 24 hours in two parts for best germination. But not all seeds need soaking. Seeds like basil, lettuce, and arugula can get slimy and slow down growth. Knowing which seeds soak best helps you tailor your soaking methods for your garden. Step-by-Step Guide to Soaking Seeds Soaking seeds is key for faster germination, mainly for seeds with hard shells. A structured approach boosts the chance of successful sprouting. This guide will help you prepare and soak your seeds effectively. Gathering Your Materials Before starting, make sure you have these materials: Strong paper towels A spray bottle filled with water Flat containers to hold the seeds Having these items ready makes the soaking process smooth. It’s the first step in successful seed pre-soaking. Sprinkling and Spraying Your Seeds With your materials ready, lay paper towels flat in the containers. Spread the seeds out evenly to prevent them from touching. A light spray from the water bottle keeps them moist without being too wet. This method is great for bigger seeds like beans and peas. They often need pre-soaking to germinate well. Covering and Waiting for Optimal Results After soaking, cover the seeds with another paper towel or plastic wrap. This creates a warm, moist environment, helping seeds to germinate better. Let the seeds soak for 8 to 24 hours; overnight is usually enough. Check the seeds often to keep them moist but not too wet. Excess water can cause rot. Plant the soaked seeds within a few hours to start the germination process. Exploring Different Seed Soaking Methods Using the right seed soaking methods can really help seeds grow faster. Each method is designed for specific seeds, aiming to get them to sprout quicker. Here are some top ways to try. Simple Water Soaking Technique Soaking seeds in water is a basic but effective way to start. It makes the seeds swell and breaks their outer layer. The soaking time varies, from 8 to 24 hours, based on the seed size and coating thickness. Smaller seeds with thinner coatings usually need 8 to 12 hours. But, be careful not to soak them too long. This can cause them to lack oxygen. It’s important to watch the time closely. This method can really boost germination rates and speed up growth. Using Paper Towels for Seed Soaking Using damp paper towels is another good way to soak seeds. It keeps the seeds moist without drowning them. Seeds between moist paper towels can soak up water well without rotting. After a couple of days, you might see the seeds starting to sprout. This shows how paper towels can help seeds grow faster. Advanced Techniques: Scarification and Soaking For seeds with hard outer layers, scarification is a more advanced method. It involves lightly scratching the seed coat to help water get in. This is great for bigger seeds like pumpkins and beans. After scarifying, it’s important to plant the seeds right away. This protects the embryo and helps the seeds germinate successfully. Optimal Seed